RobotRescue
Train your robot to look for hidden pearls in a maze.
Rescue
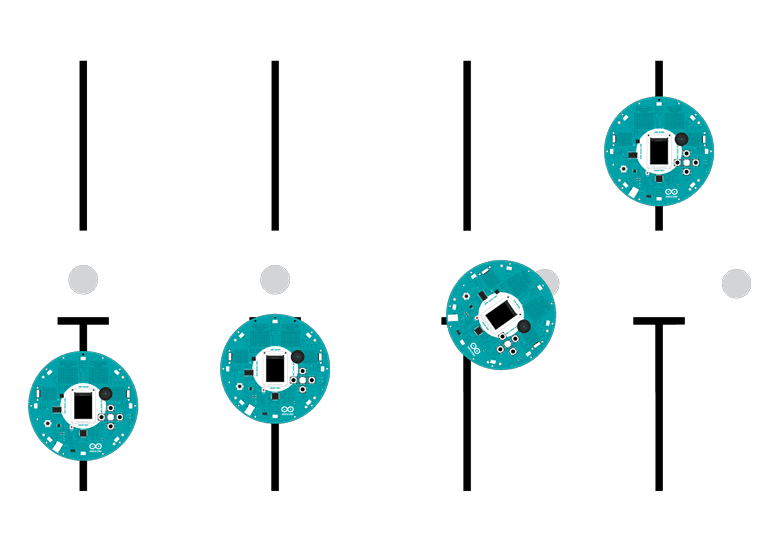
The Rescue challenge in robotics consists of getting your robot to follow a line until it reaches a location where it will perform a task. In this case, the robot makes it to an obstacle, pushes it out of the way, and continues along.
Hardware Required
Arduino Robot
Large paper
Thick black marker
Obstacles, like empty cans, or not too-heavy toys
"victim" objects
Instruction
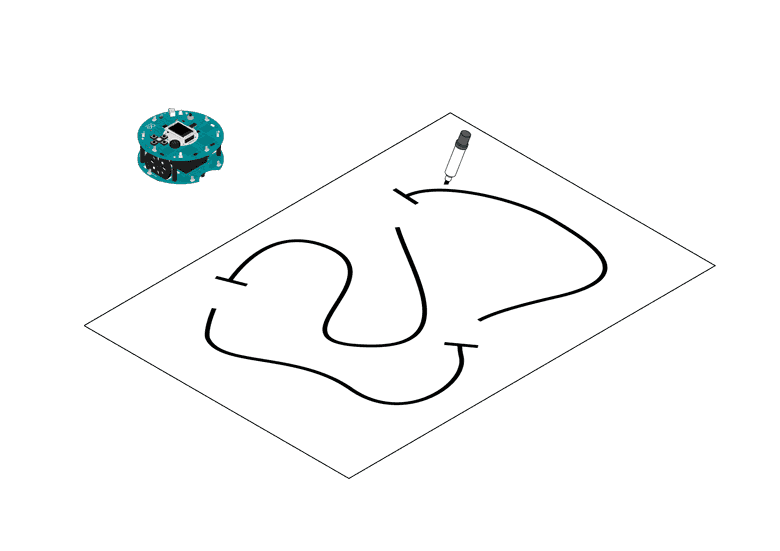
To prepare the track, follow the instructions in line following example. There are a few differences:
Add some end lines for the robot to stop. Create a gap in the line, and draw a rectangle about the size of the robot in the gap.
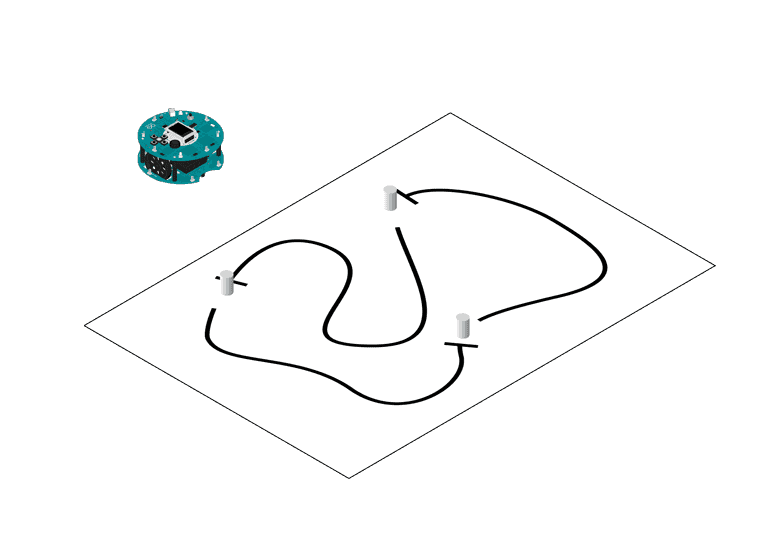
Put the "victim" object inside the rectangle.
Upload the example, unplug USB and turn on power.
Put robot on the track, on the line.
The robot will start following the line, and push the victim out of its location
If the robot does not follow the line well, see lineFollowConfig() for details on calibration.
Try it out
First, draw your racing track, adding the stops (perpendicular lines) for the robot to know where the obstacles will be.
Place your obstacles on the track. The robot can push some weight, like empty soda cans or small plastic toys make for good obstacles.
Put the robot on the track and turn it on to see if it can solve the challenge.
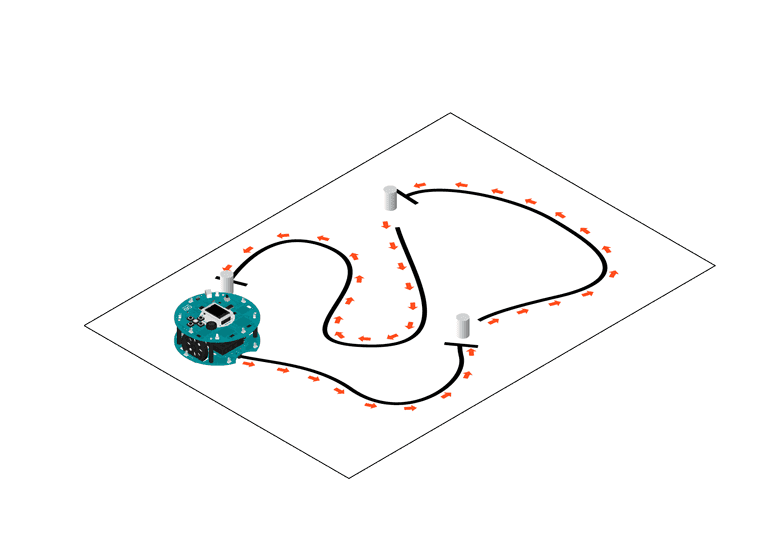
In front of an obstacle, the robot slows down, starts pushing the object, backs up and starts racing again.
Code
1/* Robot Rescue2
3 In this example, the robot enters the line following mode and4
5 plays some music until it reaches its target. Once it finds the6
7 target, it pushes it out of the track. It then returns to the8
9 track and looks for a second target.10
11 You can make the robot push as many objects as you want to, just12
13 add more to calls to the rescue function or even move that code14
15 into the loop.16
17 Circuit:18
19 * Arduino Robot20
21 * some objects for the robot to push22
23 * a line-following circuit24
25 created 1 May 201326
27 by X. Yang28
29 modified 12 May 201330
31 by D. Cuartielles32
33 This example is in the public domain34
35 */36
37#include <ArduinoRobot.h> // include the robot library38#include <Wire.h>39
40void setup() {41
42 // initialize the Robot, SD card, display, and speaker43
44 Robot.begin();45
46 Robot.beginTFT();47
48 Robot.beginSD();49
50 Robot.beginSpeaker();51
52 // draw "lg0.bmp" and "lg1.bmp" on the screen53
54 Robot.displayLogos();55
56 // display the line following instructional image from the SD card57
58 Robot.drawBMP("lf.bmp", 0, 0);59
60 // play the chase music file61
62 Robot.playFile("chase.sqm");63
64 // add the instructions65
66 Robot.text("Rescue\n\n place the robot on\n the rescue track\n pushing the\n obstacles away", 5, 5);67
68 Robot.text("Press the middle\n button to start...", 5, 61);69
70 Robot.waitContinue();71
72 // start73
74 Robot.fill(255, 255, 255);75
76 Robot.stroke(255, 255, 255);77
78 Robot.rect(0, 0, 128, 80); // erase the previous text79
80 Robot.stroke(0, 0, 0);81
82 Robot.text("Start", 5, 5);83
84 // use this to calibrate the line following algorithm85
86 // uncomment one or the other to see the different behaviors of the robot87
88 // Robot.lineFollowConfig(14, 9, 50, 10);89
90 Robot.lineFollowConfig(11, 7, 60, 5);91
92 // run the rescue sequence93
94 rescueSequence();95
96 // find the track again97
98 goToNext();99
100 // run the rescue sequence a second time101
102 rescueSequence();103
104 // here you could go on ...105
106}107
108void loop() {109
110 //nothing here, the program only runs once.111}112
113// run the sequence114void rescueSequence() {115
116 //set the motor board into line-follow mode117
118 Robot.setMode(MODE_LINE_FOLLOW);119
120 while (!Robot.isActionDone()) { // wait until it is no longer following the line121
122 }123
124 delay(1000);125
126 // do the rescue operation127
128 doRescue();129
130 delay(1000);131}132
133void doRescue() {134
135 // Reached the endline, engage the target136
137 Robot.motorsWrite(200, 200);138
139 delay(250);140
141 Robot.motorsStop();142
143 delay(1000);144
145 // Turn the robot146
147 Robot.turn(90);148
149 Robot.motorsStop();150
151 delay(1000);152
153 // Move forward154
155 Robot.motorsWrite(200, 200);156
157 delay(500);158
159 Robot.motorsStop();160
161 delay(1000);162
163 // move backwards, leave the target164
165 Robot.motorsWrite(-200, -200);166
167 delay(500);168
169 Robot.motorsStop();170}171
172void goToNext() {173
174 // Turn the robot175
176 Robot.turn(-90);177
178 Robot.motorsStop();179
180 delay(1000);181}Suggest changes
The content on docs.arduino.cc is facilitated through a public GitHub repository. If you see anything wrong, you can edit this page here.
License
The Arduino documentation is licensed under the Creative Commons Attribution-Share Alike 4.0 license.