RobotDiscoBot
Turn your robot into an 8-bit jukebox and dance to the beat.
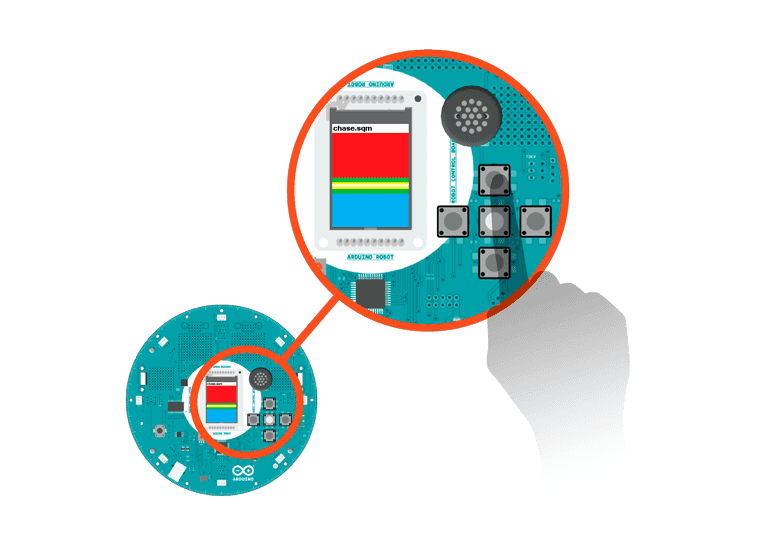
Disco bot
This sketch demonstrates how to play a melody with the robot, by playing back some sound files.
You can choose between three melodies specially composed for the Arduino Robot using the buttons on the control board. Once you get the music you like, put the robot on the floor and it will dance for you.
Hardware Required
Arduino Robot
Your best dance outfit
Instruction
Upload the example, unplug USB and turn on power.
Place the robot on the ground
After the starting screen, the robot will be dancing with music playing and flashing colors on the screen
You can press left/right button to switch music
If you're not satisfied with the dancing moves, change the example to make it dance differently :
Locate the line
char danceScript[]="S4L1R1S2F1B1S1\0"S: stop, L: turn left, R: turn right, F: go forward, B: go backwards
The number after each command decides how long it lasts. 1 = 500ms, 2=1000ms, 3=1500ms, and so forth.
Try it out
Code
1/* Disco Bot2
3 This sketch shows you how to use the melody playing4
5 feature of the robot, with some really cool 8-bit music.6
7 Music will play when the robot is turned on, and it8
9 will show you some dance moves.10
11 Circuit:12
13 * Arduino Robot14
15 created 1 May 201316
17 by X. Yang18
19 modified 12 May 201320
21 by D. Cuartielles22
23 This example is in the public domain24
25 */26
27#include <ArduinoRobot.h> // include the robot library28#include <Wire.h>29
30/* Dancing steps:31
32 S: stop33
34 L: turn left35
36 R: turn right37
38 F: go forward39
40 B: go backwards41
42 The number after each command determines how long43
44 each step lasts. Each number is 1/2 second long.45
46 The "\0" indicates end of string47
48*/49char danceScript[] = "S4L1R1S2F1B1S1\0";50
51int currentScript = 0; // what step are we at52
53int currentSong = 0; // keep track of the current song54static const int SONGS_COUNT = 3; // number of songs55
56// an array to hold the songs57char musics[][11] = {58
59 "melody.sqm",60
61 "menu.sqm",62
63 "chase.sqm",64};65
66// variables for non-blocking delay67long waitFrom;68long waitTime = 0;69
70void setup() {71
72 // initialize the Robot, SD card, display, and speaker73
74 Robot.begin();75
76 Robot.beginSpeaker();77
78 Robot.beginSD();79
80 Robot.beginTFT();81
82 // draw "lg0.bmp" and "lg1.bmp" on the screen83
84 Robot.displayLogos();85
86 // Print instructions to the screen87
88 Robot.text("1. Use left and\n right key to switch\n song", 5, 5);89
90 Robot.text("2. Put robot on the\n ground to dance", 5, 33);91
92 // wait for a few soconds93
94 delay(3000);95
96 setInterface(); // display the current song97
98 play(0); //play the first song in the array99
100 resetWait(); //Initialize non-blocking delay101}102
103void loop() {104
105 // read the buttons on the robot106
107 int key = Robot.keyboardRead();108
109 // Right/left buttons play next/previous song110
111 switch (key) {112
113 case BUTTON_UP:114
115 case BUTTON_LEFT:116
117 play(-1); //play previous song118
119 break;120
121 case BUTTON_DOWN:122
123 case BUTTON_RIGHT:124
125 play(1); //play next song126
127 break;128
129 }130
131 // dance!132
133 runScript();134}135
136// Dancing function137void runScript() {138
139 if (!waiting()) { // if the previous instructions have finished140
141 // get the next 2 commands (direction and duration)142
143 parseCommand(danceScript[currentScript], danceScript[currentScript + 1]);144
145 currentScript += 2;146
147 if (danceScript[currentScript] == '\0') { // at the end of the array148
149 currentScript = 0; // start again at the beginning150
151 }152
153 }154}155
156// instead of delay, use this timer157
158bool waiting() {159
160 if (millis() - waitFrom >= waitTime) {161
162 return false;163
164 } else {165
166 return true;167
168 }169}170
171// how long to wait172void wait(long t) {173
174 resetWait();175
176 waitTime = t;177}178
179// reset the timer180void resetWait() {181
182 waitFrom = millis();183}184
185// read the direction and dirstion of the steps186void parseCommand(char dir, char duration) {187
188 //convert the scripts to action189
190 switch (dir) {191
192 case 'L':193
194 Robot.motorsWrite(-255, 255);195
196 break;197
198 case 'R':199
200 Robot.motorsWrite(255, -255);201
202 break;203
204 case 'F':205
206 Robot.motorsWrite(255, 255);207
208 break;209
210 case 'B':211
212 Robot.motorsWrite(-255, -255);213
214 break;215
216 case 'S':217
218 Robot.motorsStop();219
220 break;221
222 }223
224 //You can change "500" to change the pace of dancing225
226 wait(500 * (duration - '0'));227}228
229// display the song230void setInterface() {231
232 Robot.clearScreen();233
234 Robot.stroke(0, 0, 0);235
236 Robot.text(musics[0], 0, 0);237}238
239// display the next song240void select(int seq, bool onOff) {241
242 if (onOff) { //select243
244 Robot.stroke(0, 0, 0);245
246 Robot.text(musics[seq], 0, 0);247
248 } else { //deselect249
250 Robot.stroke(255, 255, 255);251
252 Robot.text(musics[seq], 0, 0);253
254 }255}256
257// play the selected song258void play(int seq) {259
260 select(currentSong, false);261
262 if (currentSong <= 0 && seq == -1) { //previous of 1st song?263
264 currentSong = SONGS_COUNT - 1; //go to last song265
266 } else if (currentSong >= SONGS_COUNT - 1 && seq == 1) { //next of last?267
268 currentSong = 0; //go to 1st song269
270 } else {271
272 currentSong += seq; //next song273
274 }275
276 Robot.stopPlayFile();277
278 Robot.playFile(musics[currentSong]);279
280 select(currentSong, true); //display the current song281}Explore further
The melodies are stored on the SD card. They are created with a tracker program.
To write your own music, use a tracker program as explained in the Squawk library reference.
Suggest changes
The content on docs.arduino.cc is facilitated through a public GitHub repository. If you see anything wrong, you can edit this page here.
License
The Arduino documentation is licensed under the Creative Commons Attribution-Share Alike 4.0 license.