13. Running WordPress & Database Containers on Portenta X8
Learn how to run a database and WordPress container on the Portenta X8
Overview
The Arduino Portenta X8 is a powerful board that has many features that can be easily utilized with the help of Docker containers. In this tutorial, we will be using the Portenta X8 to host a web server and run WordPress using containers. This is a simple way to configure and run your own database server container and WordPress page. We can then access the WordPress site on the X8 through our web browser and begin setting it up.
Goals
- Create the file to install docker containers
- Install and run the containers
- Connect to the WordPress container running on the Portenta X8
Required Hardware and Software
- Arduino Portenta X8
- USB-C® cable (either USB-C® to USB-A or USB-C® to USB-C®)
- The docker-compose.yml file used in this tutorial
Instructions
First, make sure your Portenta X8 is set up correctly by following the User Manual's Out-of-the-Box Experience.
Creating the docker-compose.yml File
The WordPress container we use is a multi-container application, which also requires a database server container. The WordPress multi-container application uses Apache as its web server. It is required to make the service operational and comes included within the container. We will be using MariaDB as our database server as a container instance.
This container can run on the Portenta X8's architecture. To start using these containers is to build a docker-compose.yml file. This file contains information regarding what image we want to install and important configuration details, such as the username for the database, password, timezone, and database name. The same goes for the WordPress container: it will include the password and username. We will also enter the database hostname and which container will be used as the database. We recommend changing the default passwords to more secure ones by replacing the default password defined in the file below.
The Complete docker-compose.yml File
In this section, you can find the complete docker-compose.yml file that we will be using for this tutorial.
1version: "3.9"2 3services:4 db:5 image: mariadb:latest6 container_name: mariadb7 environment:8 - PUID=10009 - PGID=100010 - MYSQL_ROOT_PASSWORD=Wordpress11 - TZ=Europe/London12 - MYSQL_DATABASE=Wordpress13 - MYSQL_USER=Wordpress14 - MYSQL_PASSWORD=Wordpress15 volumes:16 - db_data:/var/lib/mysql17 restart: unless-stopped18 19 Wordpress:20 depends_on:21 - db22 image: wordpress:latest23 volumes:24 - Wordpress_data:/var/www/html25 ports:26 - "8000:80"27 restart: always28 environment:29 WORDPRESS_DB_HOST: db30 WORDPRESS_DB_USER: Wordpress31 WORDPRESS_DB_PASSWORD: Wordpress32 WORDPRESS_DB_NAME: Wordpress33volumes:34 Wordpress_data: {}35 db_data: {}Now let's create a directory on our X8 and put this docker-compose.yml file on our device. You can download the file by clicking here.
Installing The Containers
First, we create a directory where we want to add our docker-compose.yml file. Using the
mkdircdTo create the file, we can use
cat > docker-compose.ymlctrl C1adb push <path to docker-compose.yml file> /home/fio/wordpress-testAlternatively, you could place the
docker-compose.ymlwordpress-test1adb push .\wordpress-test\ /home/fioBoth options work fine and depend on how you would like to handle the file.

Remember that you may need to run the next command to gain admin access for running the Docker's commands:
which default password is sudo su -fio
Before installing the containers, make sure that no other container is running on the ports that the WordPress container will use. You can check what containers are running and what port they are using by running the
docker ps -aTo remove a container first stop it with
docker stop <container id>docker rm <container id>When you are in the correct directory and no other container is running on the ports that WordPress will use, you can now run
docker compose up -d-d-dWhen the command is executed it will start installing the WordPress and MariaDB containers. This can take a while. To get the output from the containers use:
docker-compose logs -f
Connecting to the WordPress Site
To connect to the WordPress setup site, you simply need to access it with your Portenta X8's unique id and port. So we can use the following address format:
1http://portenta-x8-<uuid>.local:<port>Where you would substitute the
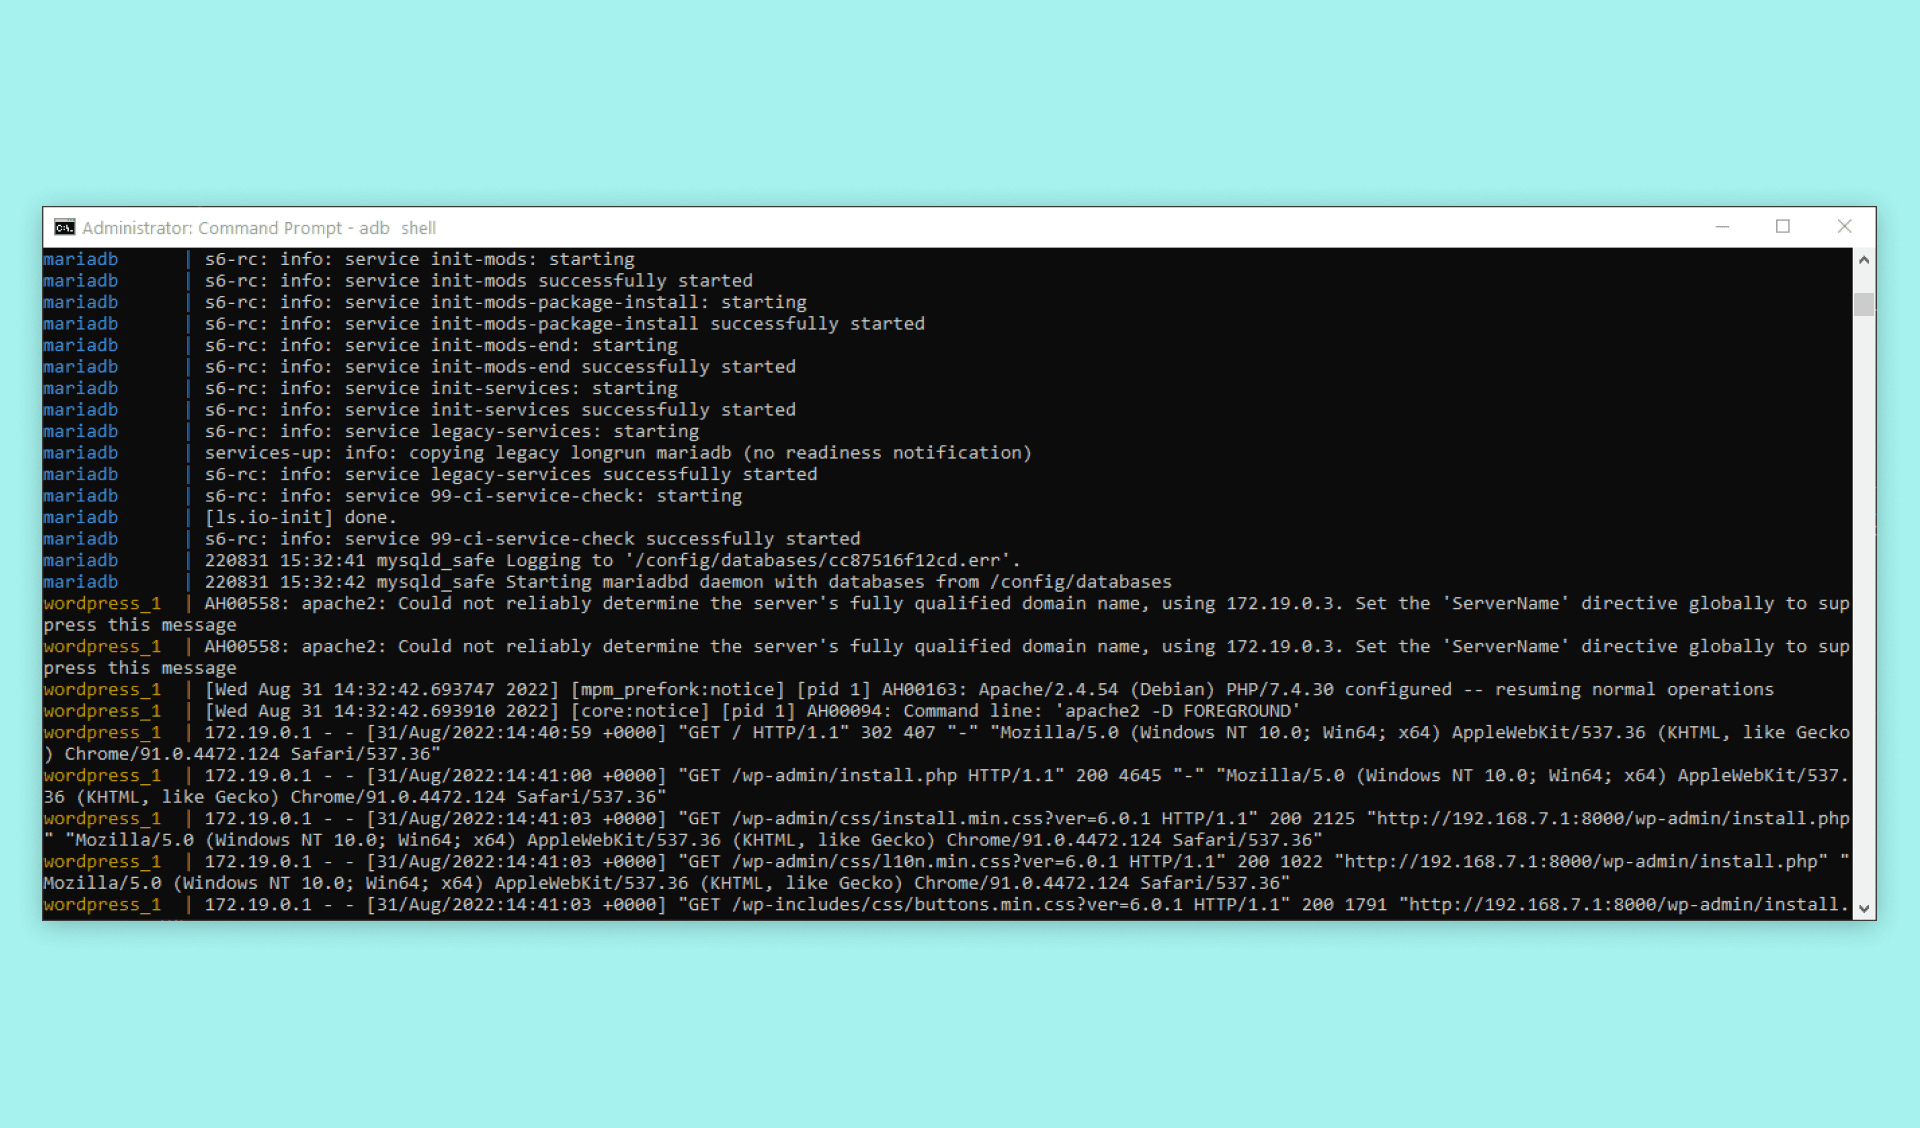
<uuid><port><uuid>adbhttp://192.168.7.1:8000http://192.168.8.1:8000When you connect, you should get some feedback in the terminal. Text will begin printing in the terminal, showing you information about the connection that has just been established as shown in the image below.
Now you should see a webpage, like the following image, in your browser.

You are now free to go through the WordPress setup process and configure it however you like.
Removing the containers
If you want to remove the container, you have to go to
/home/fio/wordpress-testRemove the container but preserves your WordPress database:
1docker compose downRemove the container and the database:
1docker compose down --volumesTo make sure that it was successful, run
docker ps -aConclusion
In this tutorial, we went through how to install and run a WordPress and database container on the Portenta X8. We then accessed the WordPress site on our X8 through our web browser. So now you can set up your own WordPress site on your X8 device and access it from another device.
Troubleshooting
If the containers are not being installed or running correctly, check if there are any other containers currently running on the same ports as the ones used by the WordPress container. You can check it with
.docker ps -aIf there is any issue running docker commands, make sure you are using
before the commands or having root access using:sudo
with password:sudo su -r
.fioIf you cannot connect to the site when everything is running, you can double-check the X8's IP address. Run the command
in the adb shell. This will display the X8's IP address via USB and Wi-Fi®. Try connecting via those IP addresses if all the rest fails.ip -h address
Suggest changes
The content on docs.arduino.cc is facilitated through a public GitHub repository. If you see anything wrong, you can edit this page here.
License
The Arduino documentation is licensed under the Creative Commons Attribution-Share Alike 4.0 license.