07. Deploy a Custom Container with Portenta X8 Manager
This tutorial will show you how to create and upload your custom container to your Portenta X8.
Overview
In this tutorial, we will create a simple container and upload it to the Arduino Portenta X8 with its manager. A container consists of an image file and all its dependencies if required. This tutorial will go through the needed files to create a container and its functions. Building this container locally and then uploading it to a Portenta X8. Using docker with ADB to build, run and attach our container to the Portenta X8.
Goals
- Learn how to create a container for use with the Portenta X8
- Learn how to upload a container to the Portenta X8
Required Hardware and Software
- Portenta X8
- ADB: Check how to connect to your Portenta X8
- USB-C® cable (either USB-C® to USB-A or USB-C® to USB-C®)
- Arduino Pro Cloud Subscription Learn more about the Pro Cloud
- Arduino IDE 1.8.10+, Arduino IDE 2, or Arduino Web Editor
Instructions
An active container uses an isolated filesystem. The container image provides its custom filesystem. Since the image contains the container’s filesystem, it must have everything required to run an application - all dependencies, configuration, scripts, binaries, etc. The image also contains further configurations for the container, such as environment variables, a default command to run, and other metadata.
Container File Structure
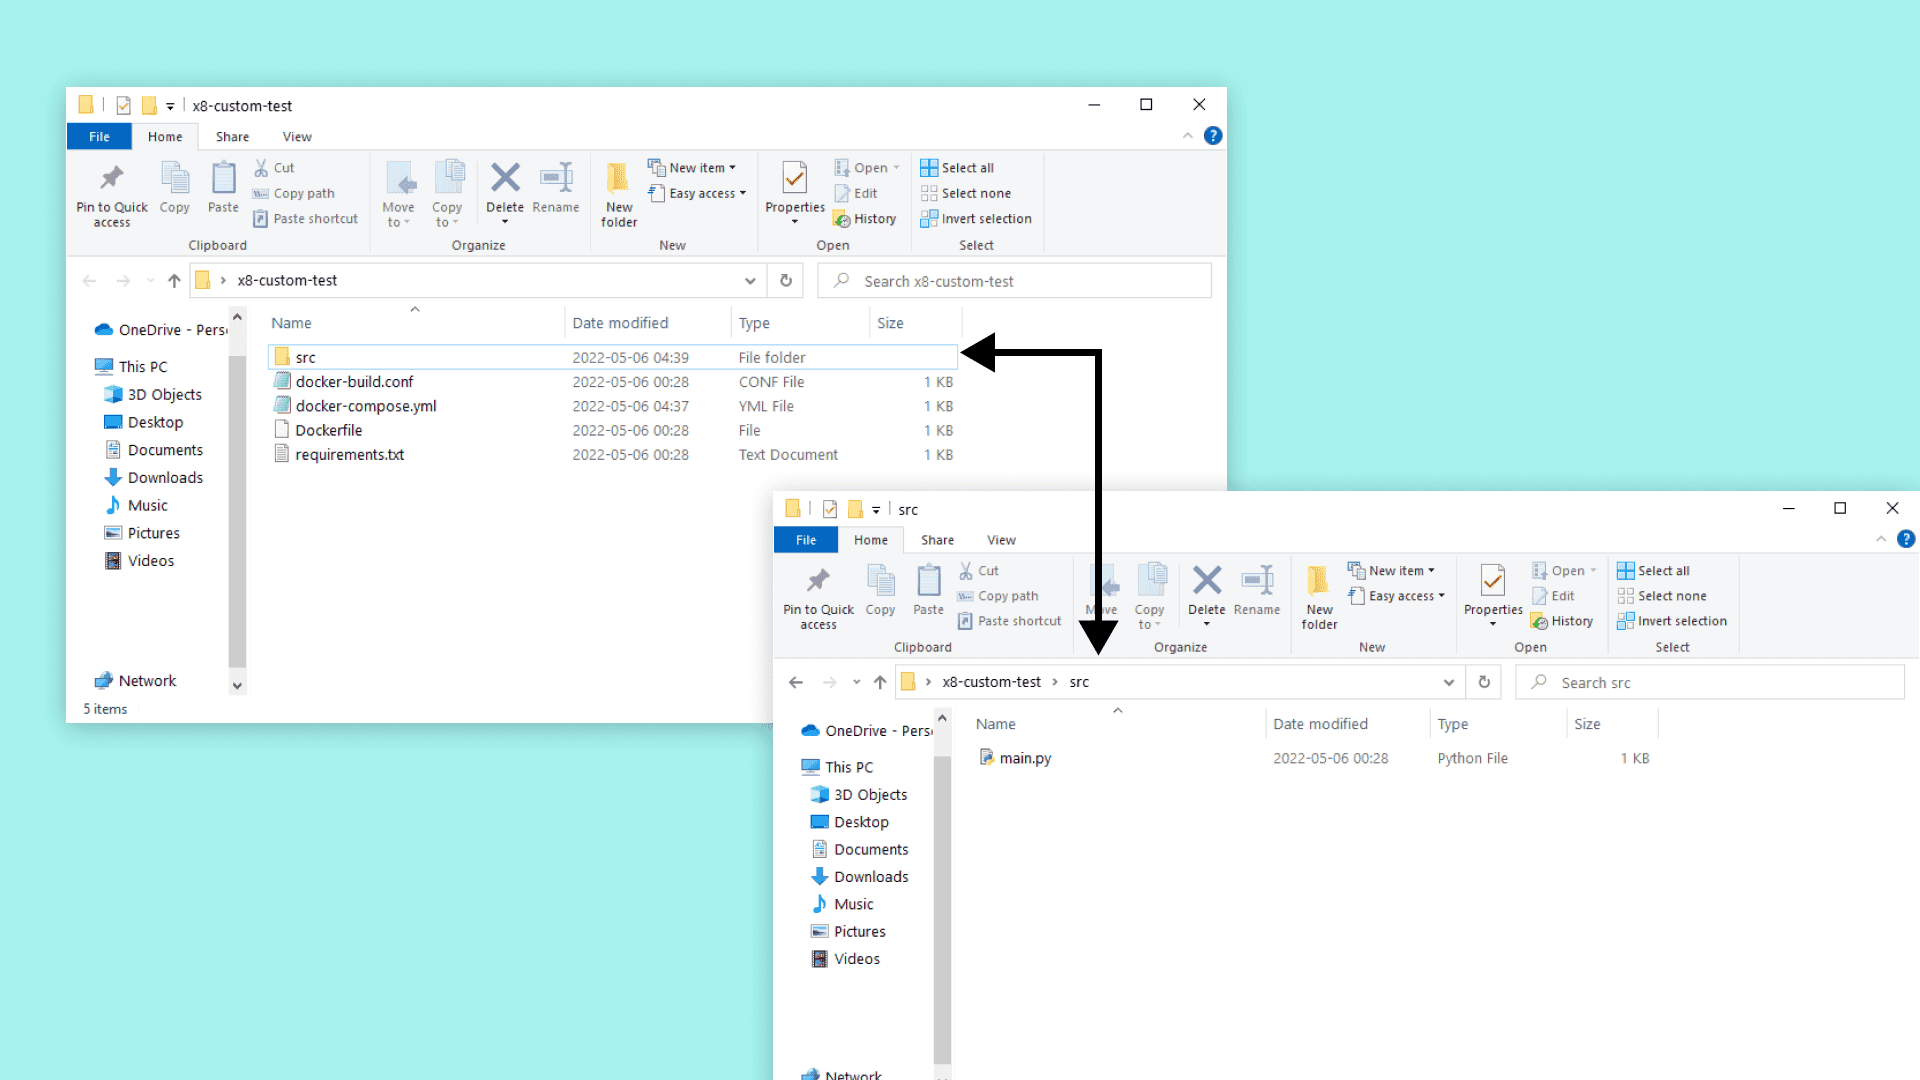
To create the container, we need to collect the necessary files. Creating a folder called x8-custom-test, the following files need to be in the folder:
- docker-build.conf
- docker-compose.yml
- Dockerfile
- requirements.txt
- src folder
- main.py (This file should be inside the src folder)
The complete folder will look like this:
Let us go through what these files contain and do.
Container File: Docker-build.conf
A file containing the minimal "unit test" command is to be executed on the container to prove it's working. Our file will make our containers minimal unit test a test of the Python3 help command.
1TEST_CMD="python3 --help"Container File: Docker-compose.yml
This file defines the app name through the Factory, permissions, and settings for the involved containers. The argument in the image tag will make it, so our image file builds locally.
1version: '3.6'2
3services:4 x8-custom-test:5 image: blob-opera:latest6 restart: always7 tty: true8 read_only: true9 user: "63"10 tmpfs:11 - /run12 - /var/lock13 - /var/log14 - /tmpContainer File: Dockerfile
This is used to build the container. A Dockerfile is a text file that contains all the instructions (FROM, COPY, COMMAND, ENTRYPOINT, etc.) that a user can use from the command line to create different image layers. Although the final image can be created using the docker
build1FROM python:3-alpine3.152
3# Set our working directory4WORKDIR /usr/src/app5
6# Copy requirements.txt first for better cache on later pushes7COPY requirements.txt requirements.txt8
9# pip install python deps from requirements.txt on the resin.io build server10RUN pip install -r requirements.txt11
12# This will copy all files in our root to the working directory in the container13COPY ./src/main.py ./14
15# Enable udevd so that plugged dynamic hardware devices show up in our container.16ENV UDEV=117
18# main.py will run when container starts up on the device19CMD ["python","-u","main.py"]Container File: Requirements.txt
The requirements text file defines needed dependencies. These dependencies serves as useful tools to build the application of the container.
1Flask==0.12.3Container File: Source
Here we will keep the source code of the app you want to run in the container or a startup script. We will create a main.py file in this folder. This script will print "Hello World!" in the CLI window.
1from flask import Flask2app = Flask(__name__)3
4@app.route('/')5def hello_world():6 return 'Hello World!'7
8if __name__ == '__main__':9 app.run(host='0.0.0.0', port=80)Uploading the Container Folder
First, you will need to set up your board to a Factory setting, as shown in the Portenta X8 Out-of-the-box experience from the User Manual.
Once finished, we will push our folder to a repository within the Factory. Let us place our folder "x8-custom-test" inside the "containers.git" repository. You can find this repository inside your Factory page under "Source". Then, on "container.git", the page URL will be used in the following command.


To pull or push repositories, you have to generate an API key. This is done by going to the user settings on the Factory page. Click on the user drop-down menu, go into the tokens page and follow the steps of creating a new API key. When creating the API key, please make sure to select the "Use for source code access" option and the correct Factory that you want to use the key for. This token will be used as the password for all git operations while the username can be anything, except an empty string.


Use the following command in git on your machine. To get the repository on your machine, replace "YOUR_FACTORY" with the name of your Factory. The "-b" parameter specifies a branch to checkout after cloning the repository. Running this command will get the container repository, where we will put our folder.
1git clone https://source.foundries.io/factories/YOUR_FACTORY/containers.git -b develPut the "x8-custom-test" folder in the repository and push it with git. When you have put the folder into the git folder, use
git statusgit addgit commitgit pushBuilding and Running the Container
After the build finishes, it can take up to 10 minutes for your device to update over-the-air to this new version. You can inspect it via the "Devices" tab of your FoundriesFactory. After your device takes the update, navigate into the "x8-custom-test" folder, which should be located on your board now. This allows us to build our container with a simple command. Using
docker build--tag1docker build --tag "x8-custom-test:latest" .Now that it is built, we can run it with
docker run1docker run -it --rm --user "63" x8-custom-test:latestUsing Docker-Compose
An option for testing an app or container is to use "docker-compose". It is helpful when we have a lot of settings in our "docker-compose.yml" file since we don't have to use those settings in the run argument with this method. First, navigate into the container folder.
1cd /home/fio/x8-custom-testThis docker-compose command will start your application and register it as a systemd service that will persist even when a reboot occurs. So at the next boot, your docker-compose app will run automatically.
1docker-compose up --detachTo stop the docker-compose app from running, use the following command:
1docker-compose stopDeploying with Docker Hub
An alternative method to deploy the custom container is by using the Docker Hub platform. For this, it needs a Docker Hub account to have your own repository to have the custom container uploaded. When you have the repository ready, the following command will let you upload the custom container image.
1docker push HUB_USERNAME/x8-custom-testThe custom container image can now be found within
HUB_USERNAME1adb shell1docker pull x8-custom-testIt will pull the container image and deploy the container on your Portenta X8.
To know more about how to create and manage repositories on Docker Hub to manage your custom containers for Portenta X8, check out here.)
Conclusion
This tutorial covered what goes into a container, how the folder should be structured, and what files it should contain. It then explained the purpose of each file and what they should have for this example. Then we went through how this relates to the Factory, and how Foundries.io makes the whole process easier for us. We then showed how to build the container and run it on the Portenta X8. Lastly, we showed a useful testing feature with docker-compose, letting us test our container with a faster process.
Next Steps
To get a better understanding of how to manage containers with Docker, take a look at our Managing Containers with Docker on Portenta X8. This tutorial will show some useful commands to use with the docker service and ADB or SSH.
Troubleshooting
Here are some errors that might occur in the process of this tutorial:
- Make sure you have followed our other tutorials that shows how to set up the Portenta X8 with Out-of-the-box experience from the User Manual
- If you are having issues with the adb shell, don't forget to try and use
andsudosu
Suggest changes
The content on docs.arduino.cc is facilitated through a public GitHub repository. If you see anything wrong, you can edit this page here.
License
The Arduino documentation is licensed under the Creative Commons Attribution-Share Alike 4.0 license.