Keyboard Reprogram
Opens a new window in the Arduino IDE and reprograms the Leonardo with a simple blink program.
This example uses the Keyboard library to open a new Arduino Software (IDE) sketch window, send keyboard commands that type in the Blink example, and reprograms the board. After running this sketch and connecting pin 2 to ground using the pushbutton, the board will have a new program, Blink.
NB: When you use the Keyboard.print() command, the Arduino takes over your computer's keyboard! To insure you don't lose control of your computer while running a sketch with this function, make sure to set up a reliable control system before you call Keyboard.print(). This sketch is designed to only send Keyboard commands after digital pin 2 is pulled to ground.
Hardware Required
Arduino Leonardo, Micro, or Due board
pushbutton
hook-up wires
breadboard
Software Required
- Arduino IDE running
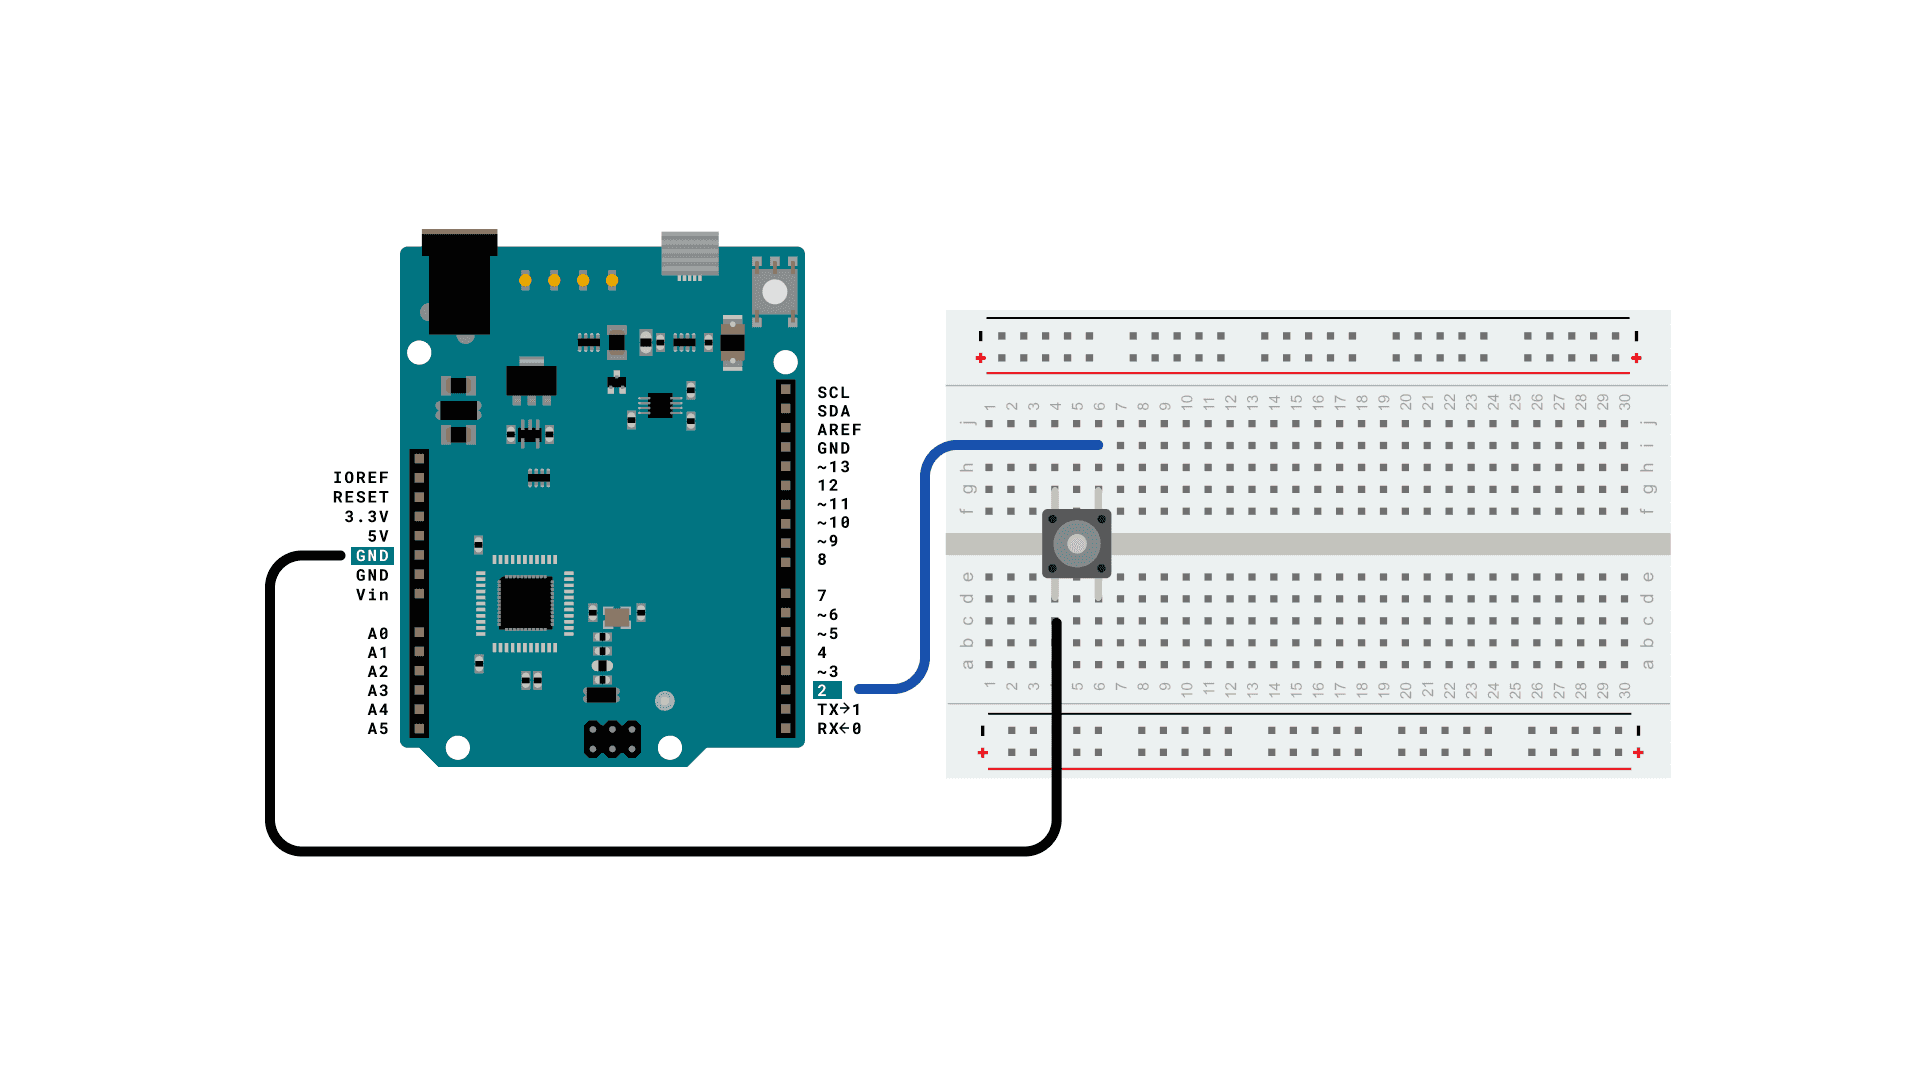
Circuit
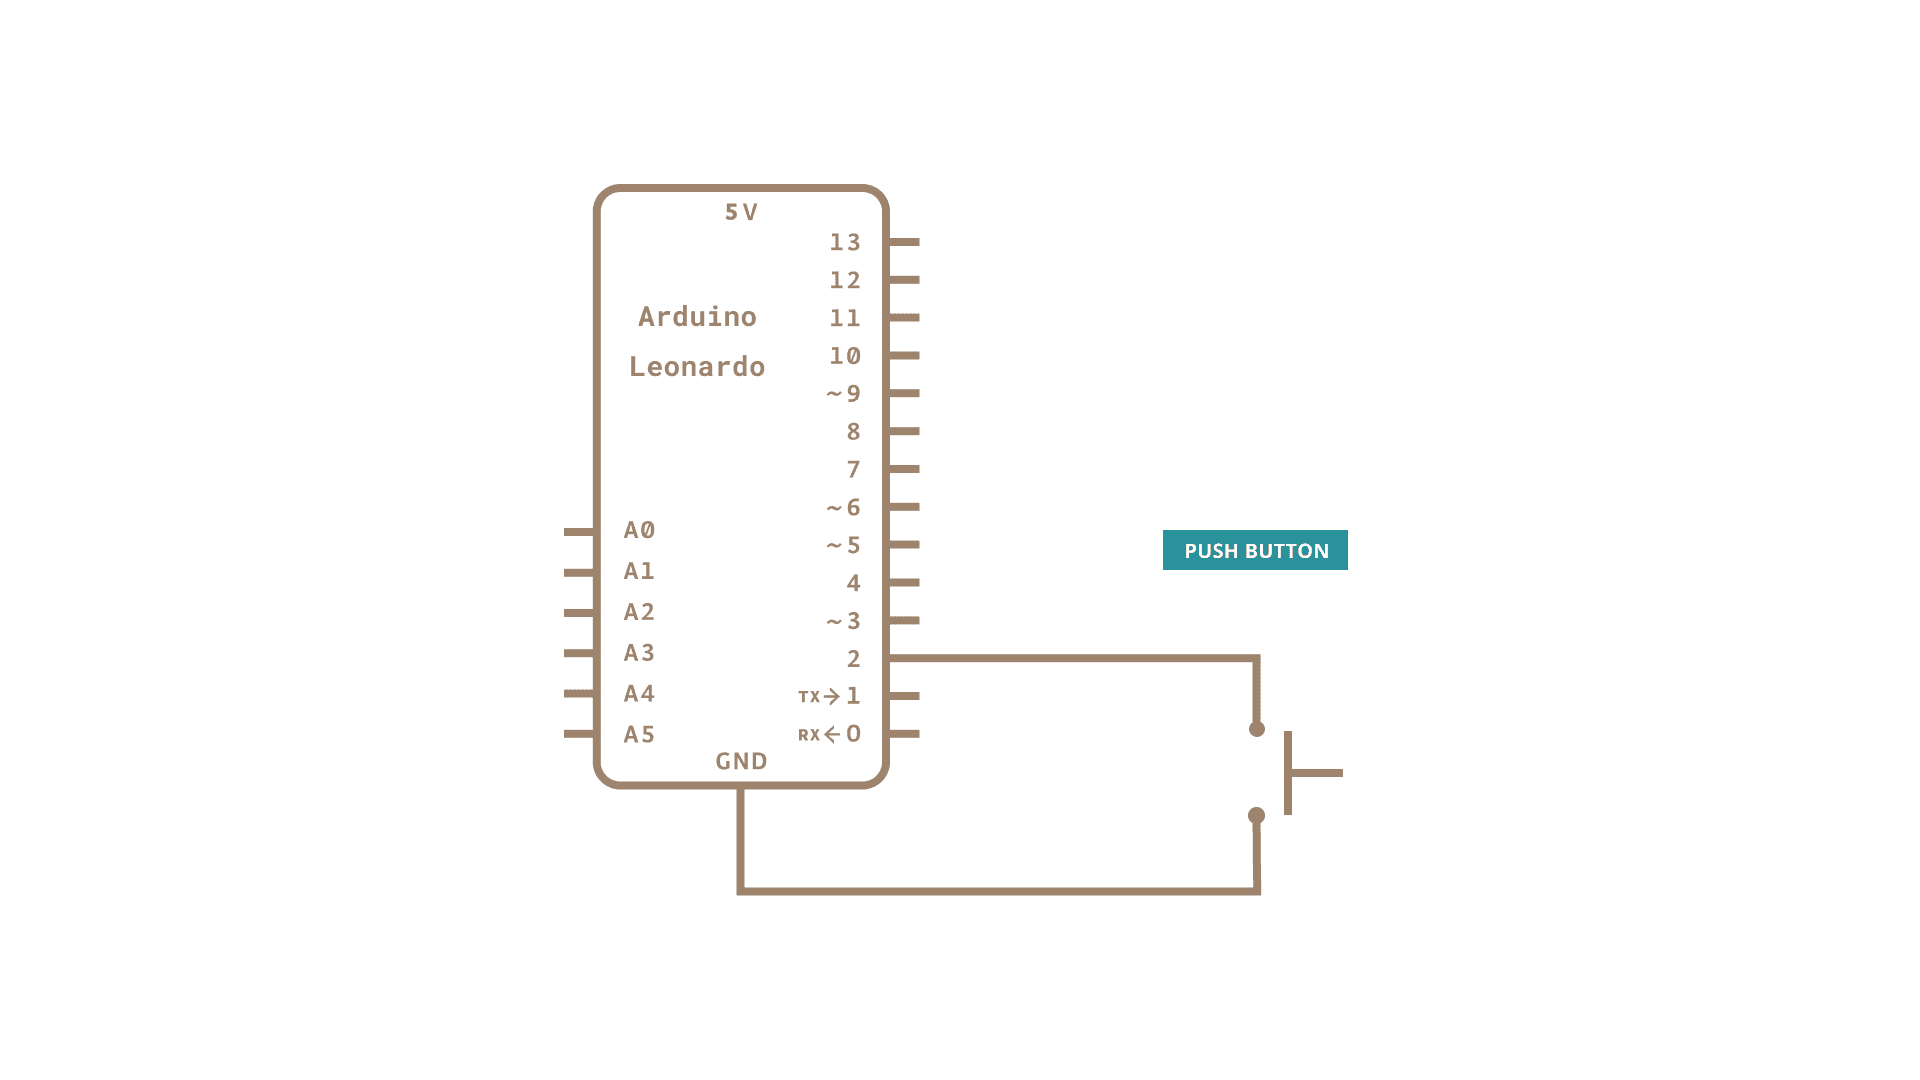
Schematic
Code
Connect your board to the USB port, then push the button to connect D2 with GND and initiate the sketch keyboard keypress emulation. Remember to have the Arduino Software (IDE) window selected before you press the button.
1/*2
3 Arduino Programs Blink4
5 This sketch demonstrates the Keyboard library.6
7 For Leonardo and Due boards only.8
9 When you connect pin 2 to ground, it creates a new window with a key10
11 combination (CTRL-N), then types in the Blink sketch, then auto-formats the12
13 text using another key combination (CTRL-T), then uploads the sketch to the14
15 currently selected Arduino using a final key combination (CTRL-U).16
17 Circuit:18
19 - Arduino Leonardo, Micro, Due, LilyPad USB, or Yún20
21 - wire to connect D2 to ground22
23 created 5 Mar 201224
25 modified 29 Mar 201226
27 by Tom Igoe28
29 modified 3 May 201430
31 by Scott Fitzgerald32
33 This example is in the public domain.34
35 https://www.arduino.cc/en/Tutorial/KeyboardReprogram36
37*/38
39#include "Keyboard.h"40
41// use this option for OSX.42// Comment it out if using Windows or Linux:43char ctrlKey = KEY_LEFT_GUI;44// use this option for Windows and Linux.45// leave commented out if using OSX:46// char ctrlKey = KEY_LEFT_CTRL;47
48void setup() {49
50 // make pin 2 an input and turn on the pull-up resistor so it goes high unless51
52 // connected to ground:53
54 pinMode(2, INPUT_PULLUP);55
56 // initialize control over the keyboard:57
58 Keyboard.begin();59}60
61void loop() {62
63 while (digitalRead(2) == HIGH) {64
65 // do nothing until pin 2 goes low66
67 delay(500);68
69 }70
71 delay(1000);72
73 // new document:74
75 Keyboard.press(ctrlKey);76
77 Keyboard.press('n');78
79 delay(100);80
81 Keyboard.releaseAll();82
83 // wait for new window to open:84
85 delay(1000);86
87 // versions of the Arduino IDE after 1.5 pre-populate new sketches with88
89 // setup() and loop() functions let's clear the window before typing anything new90
91 // select all92
93 Keyboard.press(ctrlKey);94
95 Keyboard.press('a');96
97 delay(500);98
99 Keyboard.releaseAll();100
101 // delete the selected text102
103 Keyboard.write(KEY_BACKSPACE);104
105 delay(500);106
107 // Type out "blink":108
109 Keyboard.println("void setup() {");110
111 Keyboard.println("pinMode(13, OUTPUT);");112
113 Keyboard.println("}");114
115 Keyboard.println();116
117 Keyboard.println("void loop() {");118
119 Keyboard.println("digitalWrite(13, HIGH);");120
121 Keyboard.print("delay(3000);");122
123 // 3000 ms is too long. Delete it:124
125 for (int keystrokes = 0; keystrokes < 6; keystrokes++) {126
127 delay(500);128
129 Keyboard.write(KEY_BACKSPACE);130
131 }132
133 // make it 1000 instead:134
135 Keyboard.println("1000);");136
137 Keyboard.println("digitalWrite(13, LOW);");138
139 Keyboard.println("delay(1000);");140
141 Keyboard.println("}");142
143 // tidy up:144
145 Keyboard.press(ctrlKey);146
147 Keyboard.press('t');148
149 delay(100);150
151 Keyboard.releaseAll();152
153 delay(3000);154
155 // upload code:156
157 Keyboard.press(ctrlKey);158
159 Keyboard.press('u');160
161 delay(100);162
163 Keyboard.releaseAll();164
165 // wait for the sweet oblivion of reprogramming:166
167 while (true);168}Learn more
You can find more basic tutorials in the built-in examples section.
You can also explore the language reference, a detailed collection of the Arduino programming language.
Last revision 2015/07/29 by SM
Suggest changes
The content on docs.arduino.cc is facilitated through a public GitHub repository. If you see anything wrong, you can edit this page here.
License
The Arduino documentation is licensed under the Creative Commons Attribution-Share Alike 4.0 license.