Python
Learn how to use the Python library to connect to the Arduino Cloud.
It is recommended to have some experience with the Python environment before reading this guide. However, installation and setup is covered in the Python Setup section.
The Arduino IoT Cloud Python Client is a library that allows you to interact with the Arduino Cloud via MQTT. It supports basic authentication using the device ID as well as secret key that is obtained from the Arduino Cloud when configuring a manual device.
Overview
In this guide we will:
- Configure a manual device in the Arduino Cloud,
- install the Arduino IoT Cloud Python library,
- write a Python script that connects to the Arduino Cloud.
Requirements
To follow this guide, make sure to have:
- An Arduino account,
- a version of Python installed,
- pip package manager installed,
- Arduino IoT Python Client installed.
- A code editor (we recommend VSCode with the Python extension installed).
The experience with Python and the pip package manager varies depending on your computer and operating system. Python needs to be in your PATH to use the Arduino IoT Cloud Python client.
Cloud Setup
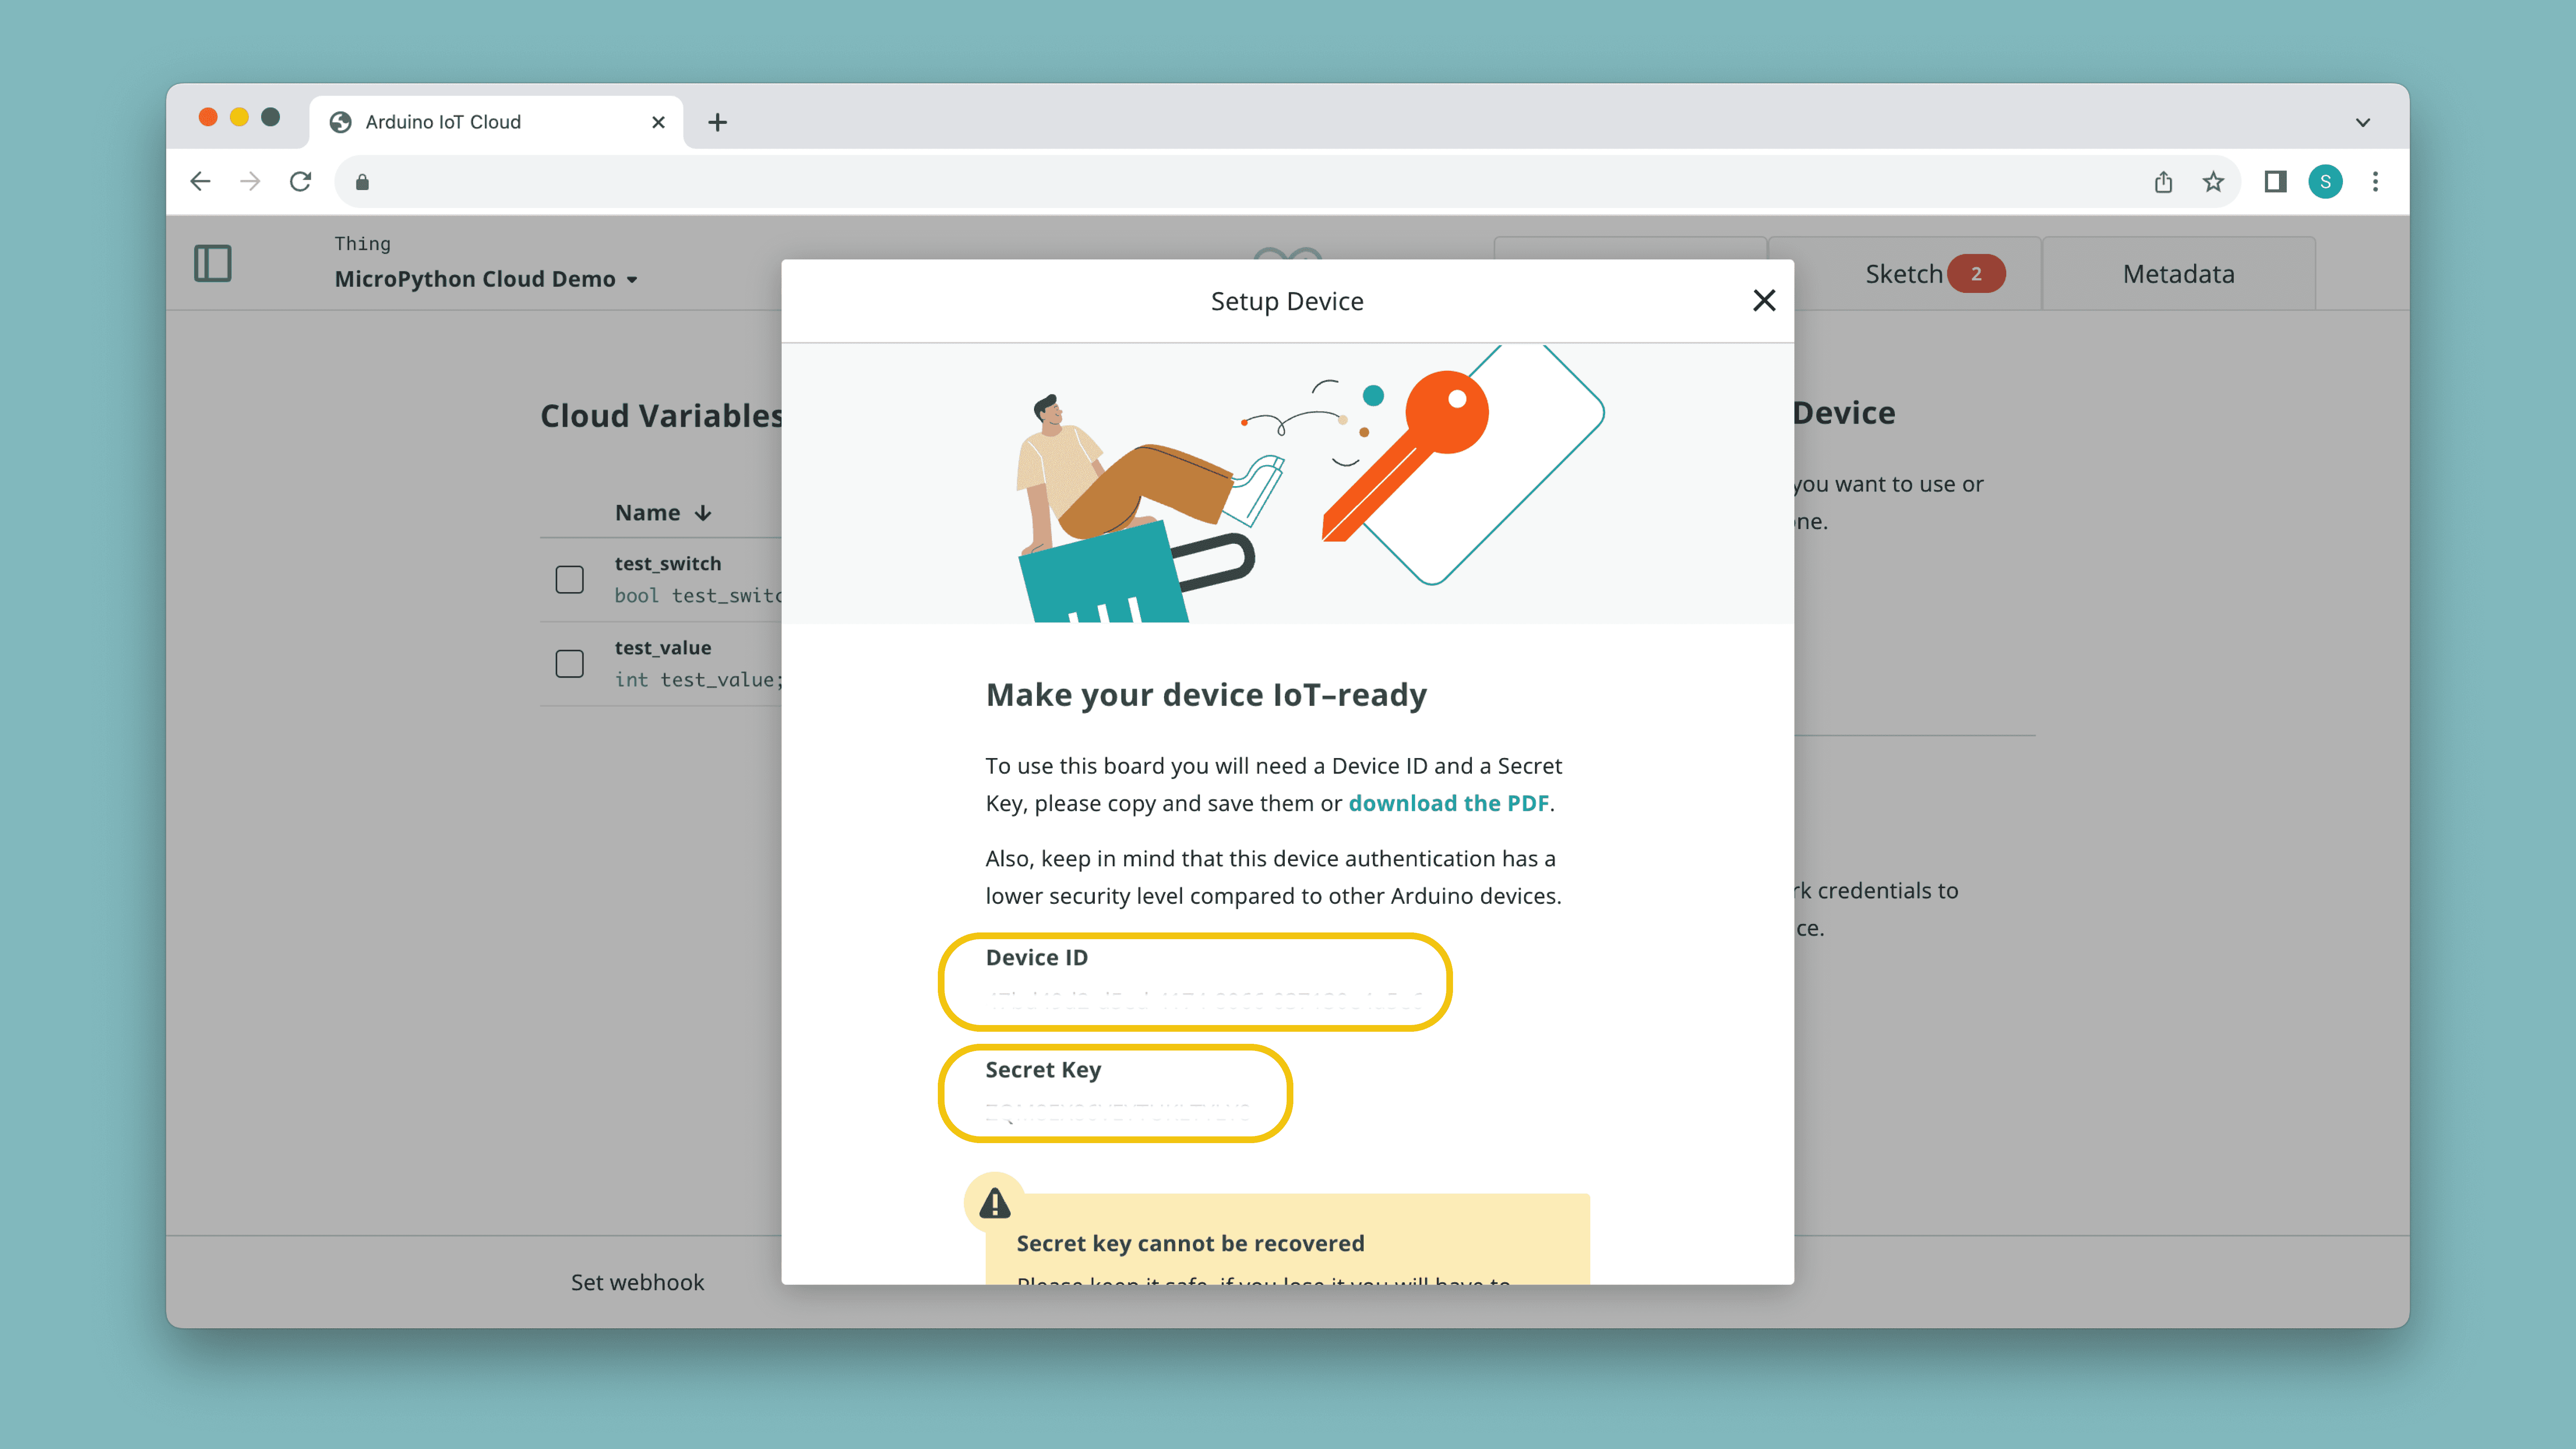
To begin with, we need to create a manual device, and create a new Thing. Navigate to the Arduino Cloud and to the "Things" tab.
Thing & Device Configuration
- Create a new Thing, by clicking on the "Create Thing" button.
- Click on the "Select Device" in the "Associated Devices" section of your Thing.
- Click on "Set Up New Device", and select the bottom category ("Manual Device"). Click continue in the next window, and choose a name for your device.
- Finally, you will see a new Device ID and a Secret Key generate. You can download them as a PDF. Make sure to save it as you cannot access your Secret Key again.
- Learn more about Things in the Things documentation
- Learn more about Devices in the Devices documentation
Create Variables
Next step is to create some Cloud variables, which we will later interact with via a Python script.
- While in Thing configuration, click on "Add Variable" which will open a new window.
- Name your variable
and select it to be of antest_switch
type.boolean - Click on "Add Variable" at the bottom of the window.
- Create another variable, name it
and select it to betest_value
type.int
You should now have two variables,
test_switchtest_value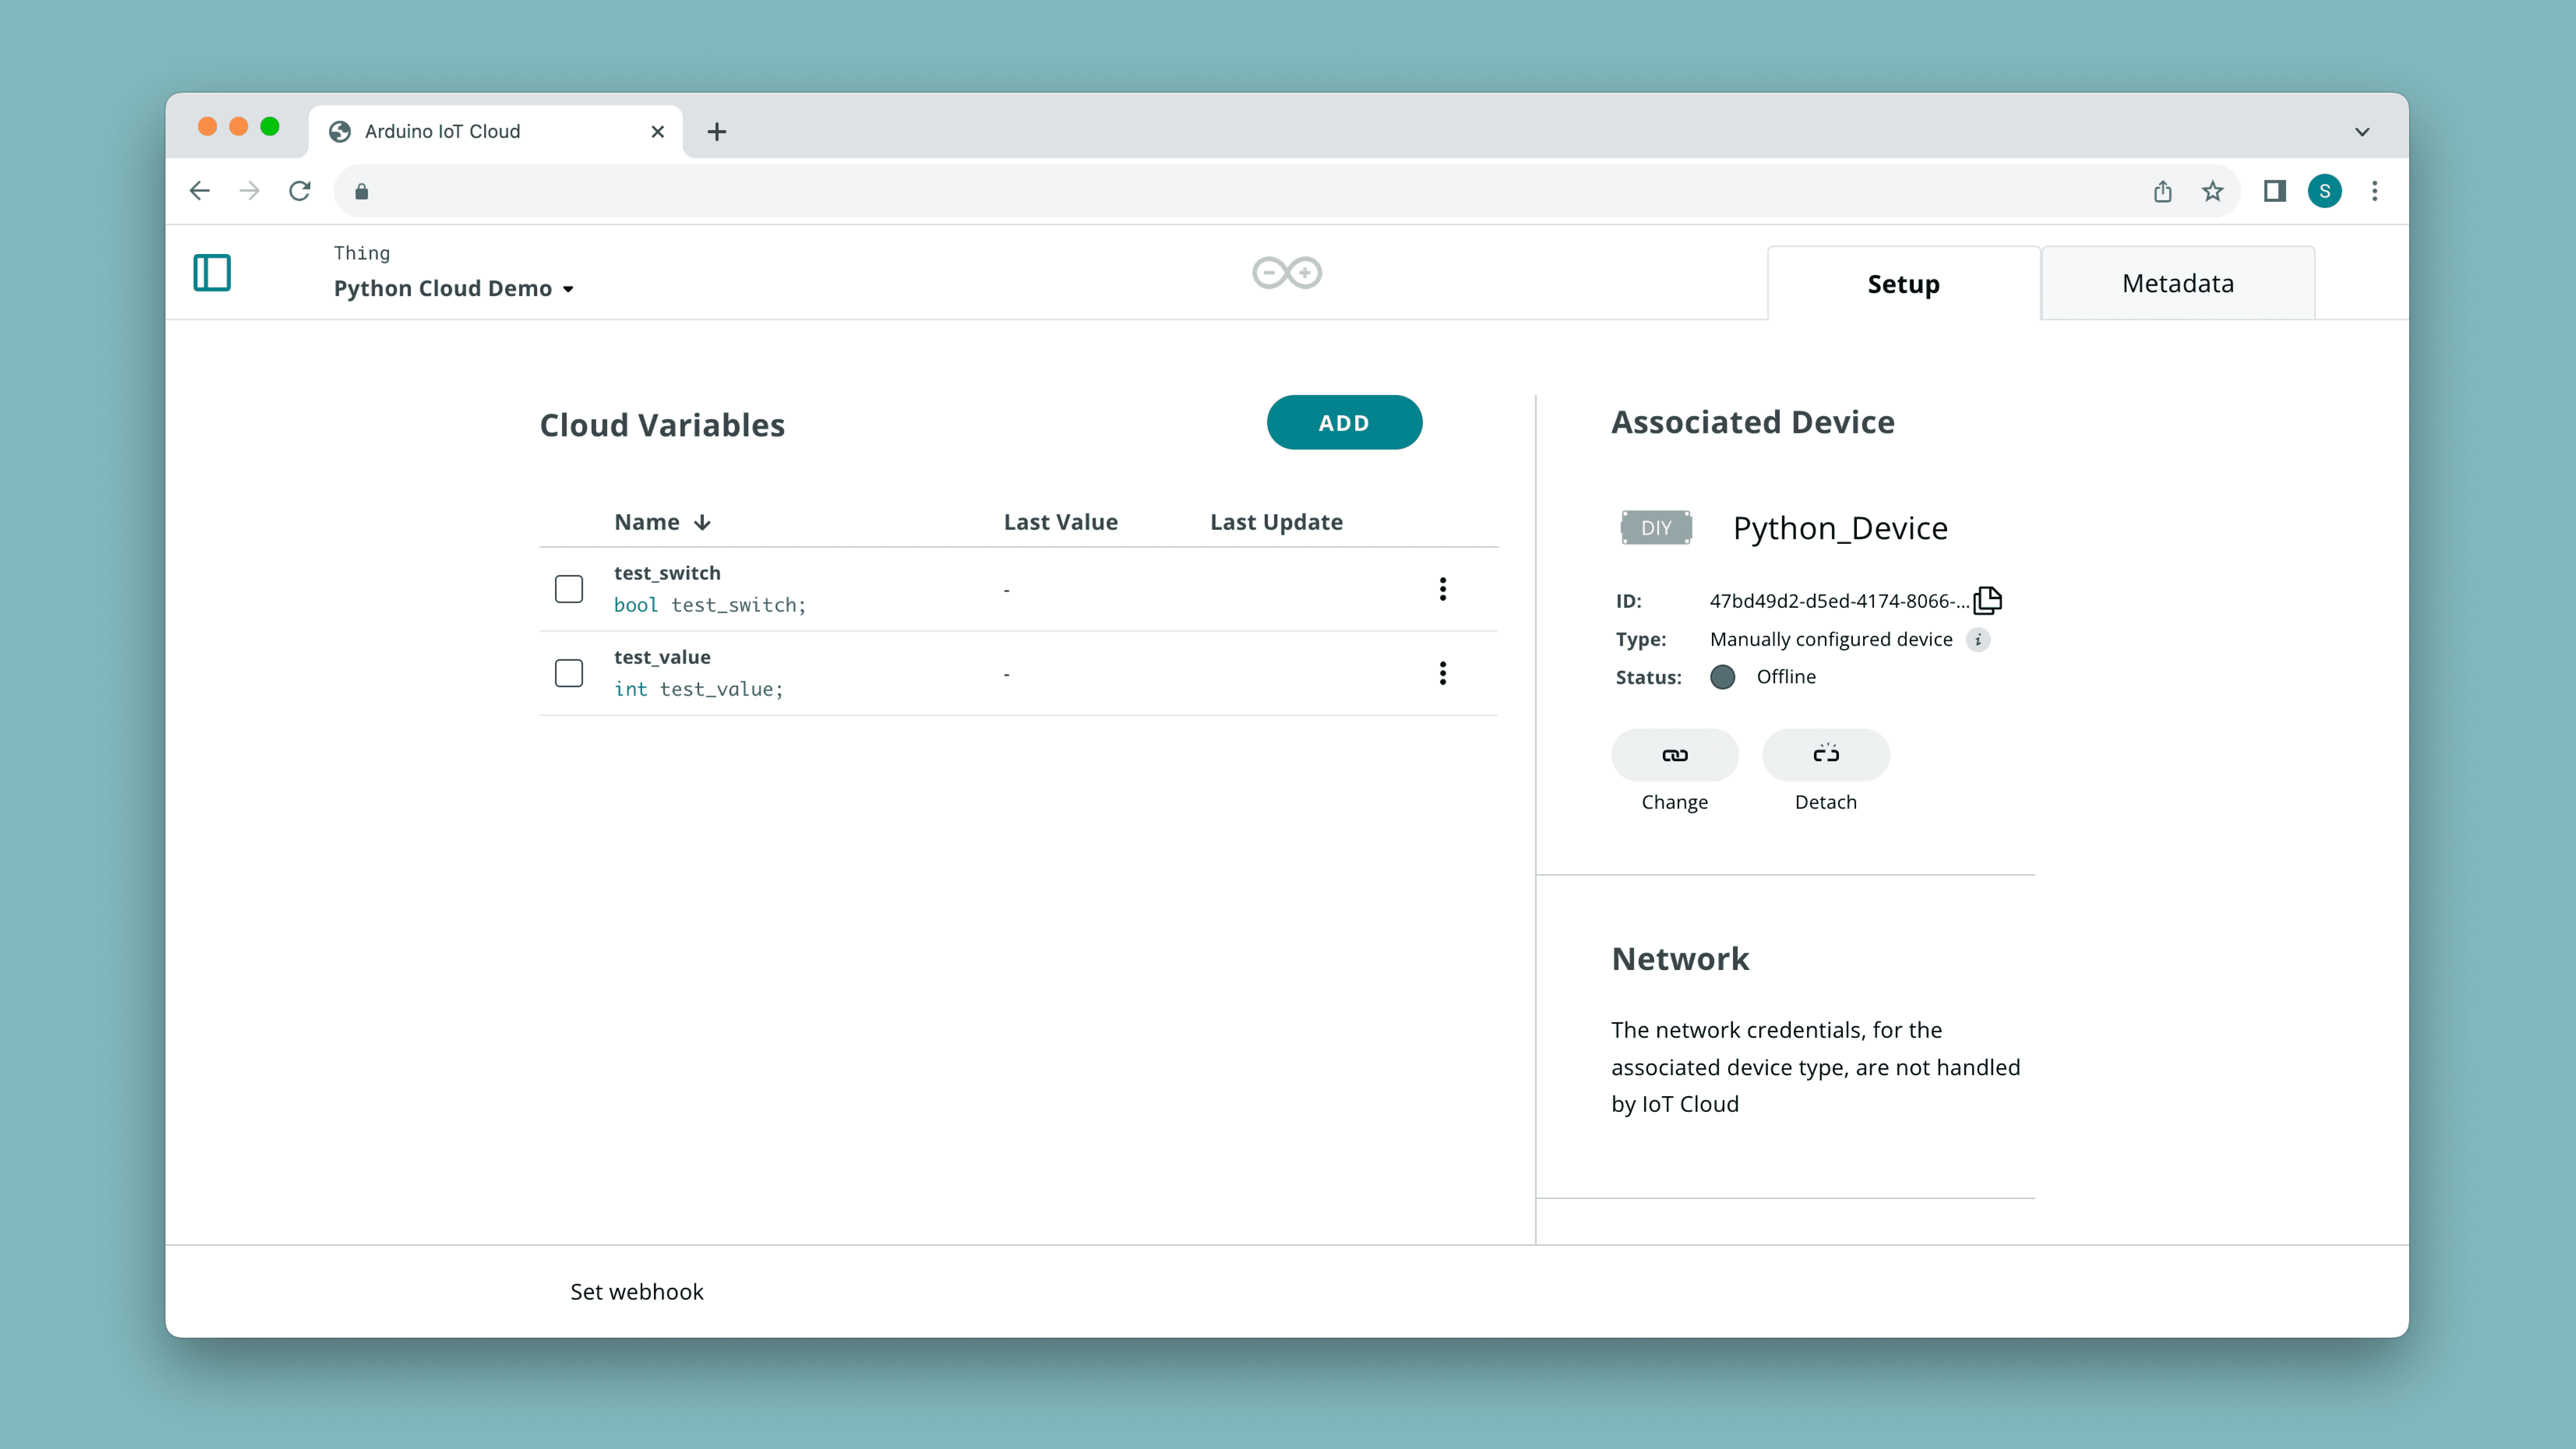
- Learn more about how variables work in the Variables documentation
Variables that we create here can also be synchronized with variables running on any other device in the platform. This makes it possible to link an Arduino boards with a Python or JavaScript project without writing any connection code!
Python Setup
Before continuing, make sure you have a version of Python installed. You can check this by opening a terminal and running:
1python --version2python3 --versionInstall Packages
To install the Arduino IoT Cloud Python client, run the following command:
1pip install arduino-iot-cloudYou will also need to install the swig package.
1pip install swigTo test out to see if your installation worked correctly, start the Python interpreter in your terminal by typing
python1from arduino_iot_cloud import ArduinoCloudClientIf you don't receive any import error, it means it is accessible and we can move on to testing out the example script.
Example Script
The script below creates a client that connects to the Arduino Cloud and synchronizes the variable values. Make sure to enter your device credentials (see Cloud Setup) in the
DEVICE_IDSECRET_KEYCreate a python file, and name it something appropriate, such as
cloud_first_test.py1import time2import logging3
4import sys5sys.path.append("lib")6
7from arduino_iot_cloud import ArduinoCloudClient8
9DEVICE_ID = b"YOUR_DEVICE_ID"10SECRET_KEY = b"YOUR_SECRET_KEY"11
12def logging_func():13 logging.basicConfig(14 datefmt="%H:%M:%S",15 format="%(asctime)s.%(msecs)03d %(message)s",16 level=logging.INFO,17 ) 18
19# This function is executed each time the "test_switch" variable changes 20def on_switch_changed(client, value):21 print("Switch Pressed! Status is: ", value)22
23if __name__ == "__main__":24
25 logging_func()26 client = ArduinoCloudClient(device_id=DEVICE_ID, username=DEVICE_ID, password=SECRET_KEY)27
28 client.register("test_value") 29 client["test_value"] = 2030 client.register("test_switch", value=None, on_write=on_switch_changed)31 32 client.start()- The script uses the
to configure the variables.client.register() - The
we simply set a static value oftest_value
.20 - For the
variable, we create a callback function that is triggered any time the value is updated. This can be controlled from a dashboard in the Arduino Cloud.test_switch
To run this script, use the following command (or the "Run" button in VSCode):
1python cloud_first_test.pyAfter running the script, you should see in the terminal that we first attempt to connect to the Arduino Cloud. Once connected, we push the variable update for
test_value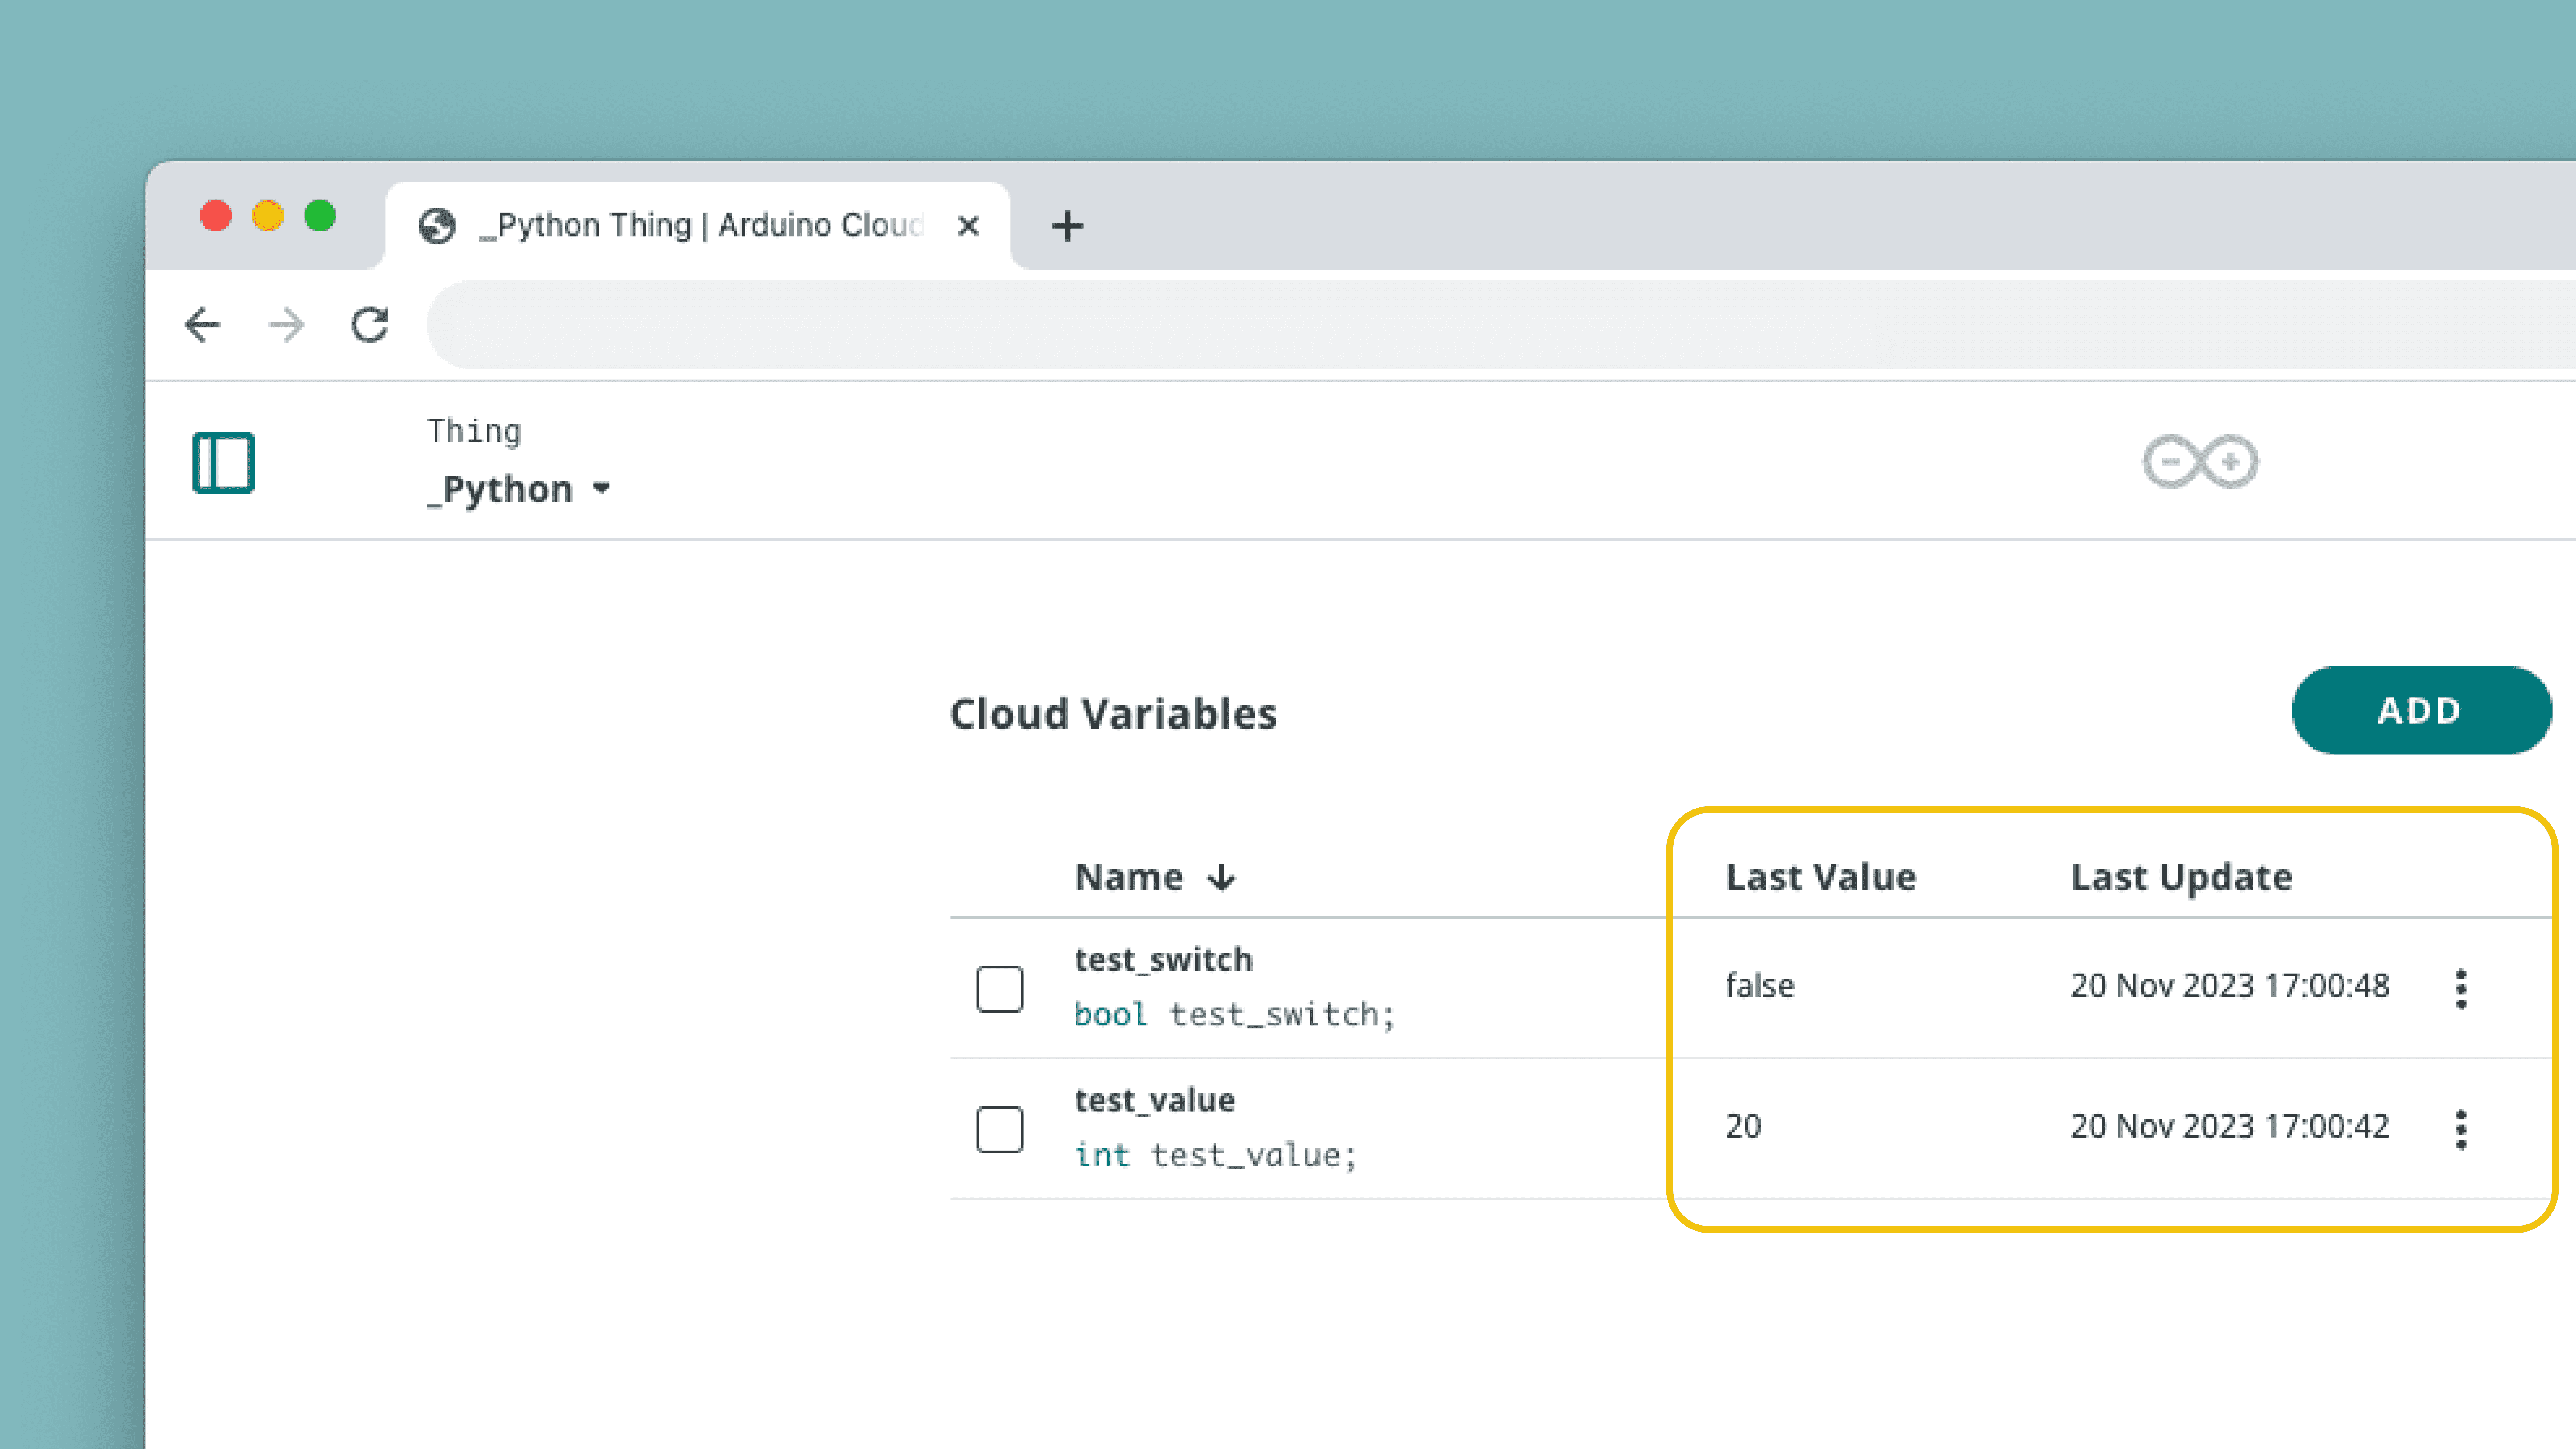
You can test out the
test_switch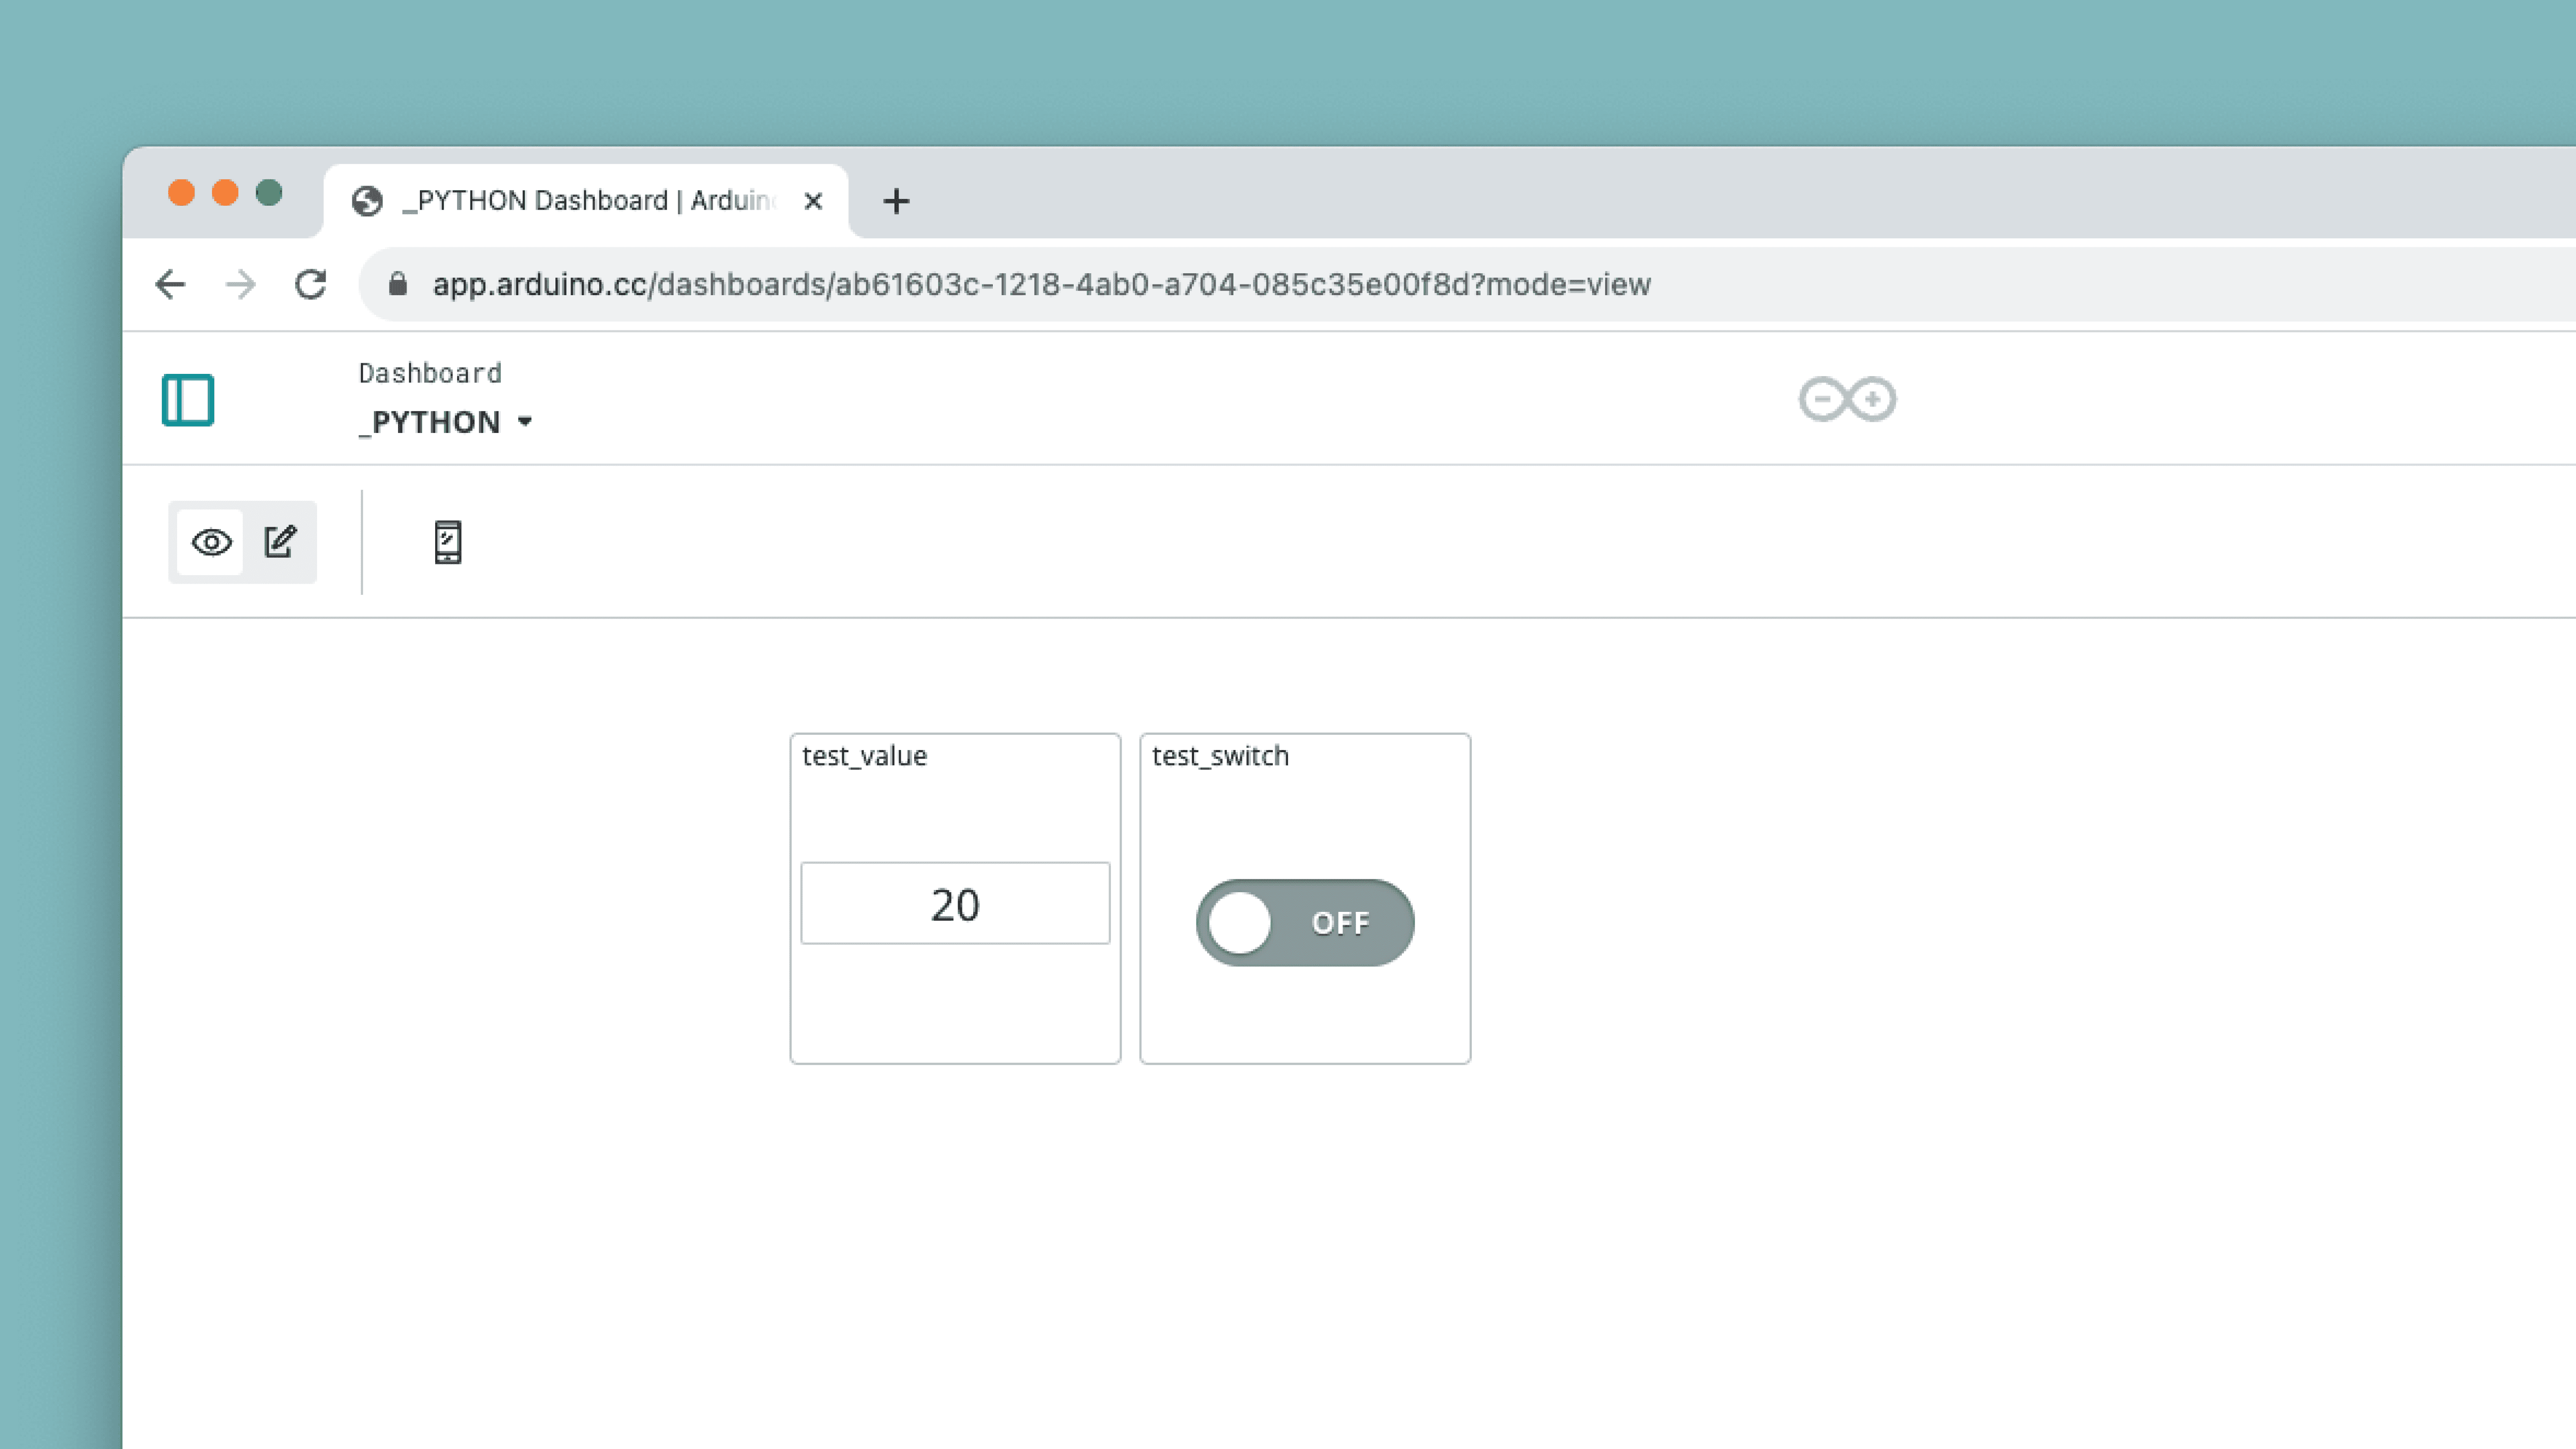
When flicking the switch, you should see the following command being printed in the terminal:
1Switch Pressed! Status is <state>For creating dashboards and linking variables, check out the Dashboard & Widgets documentation.
Troubleshooting
- encountering this error when running a script indicates that the terminal can't access Python. You can try runningcommand not found: python
, as some versions of Python requires this.python3
- this error is likely due to an invalid device ID or secret key.Connection failed 5, retrying after 1.0s
- likely if you are running an older version of the library. Try updating the library.ModuleNotFoundError: No module named '_m2crypto'
Suggest changes
The content on docs.arduino.cc is facilitated through a public GitHub repository. If you see anything wrong, you can edit this page here.
License
The Arduino documentation is licensed under the Creative Commons Attribution-Share Alike 4.0 license.